Contents
WORKSPACES
Overview
Monitor data integrity for any technology on NetChart. Save pre-settings as a way to facilitate and optimize the work.
As workspaces can be private or public, all users can have their customized workspaces.
How to use
Log in to your NetChart account.
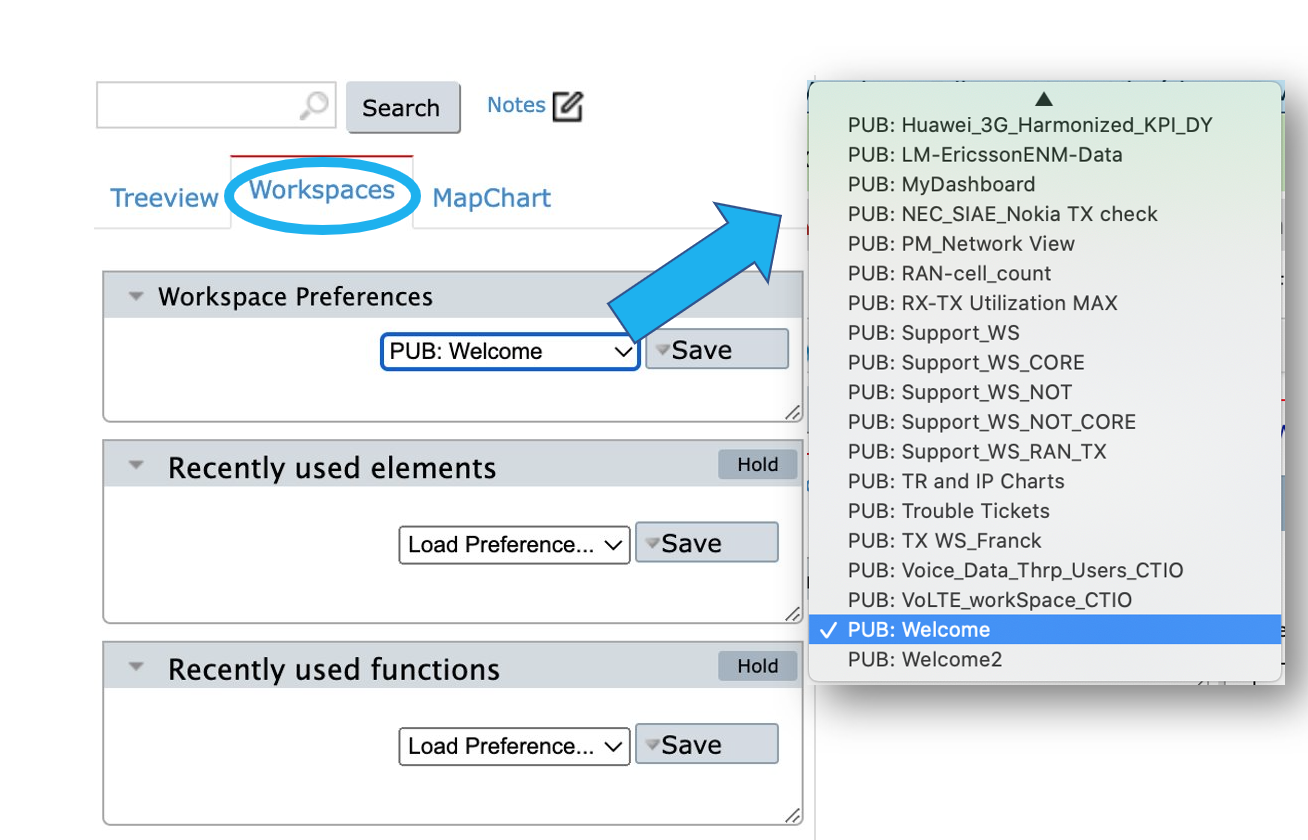
View Workspaces
Select the Workspaces tab to view your customized workspaces and public ones.
Create a workspace
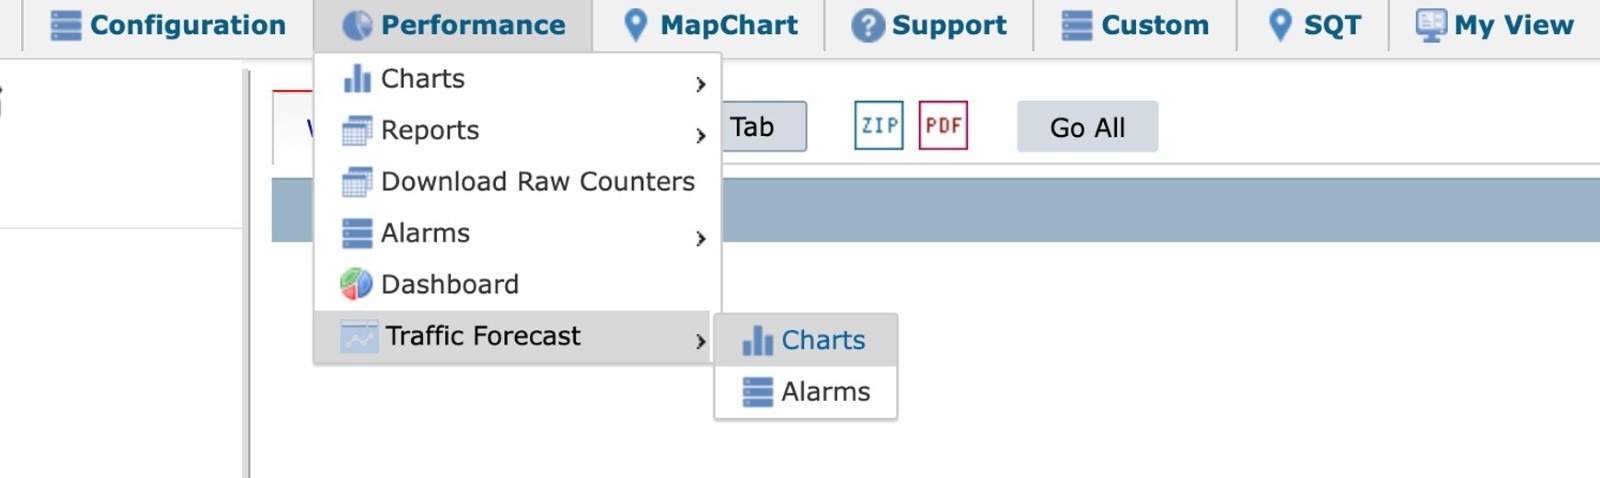
Select any feature on the top menu such as Performance > Traffic Forecast > Charts.
Define the settings for the chosen feature, which in this case are selecting Vendor, Technology, Element or Folder selection and KPI selection.
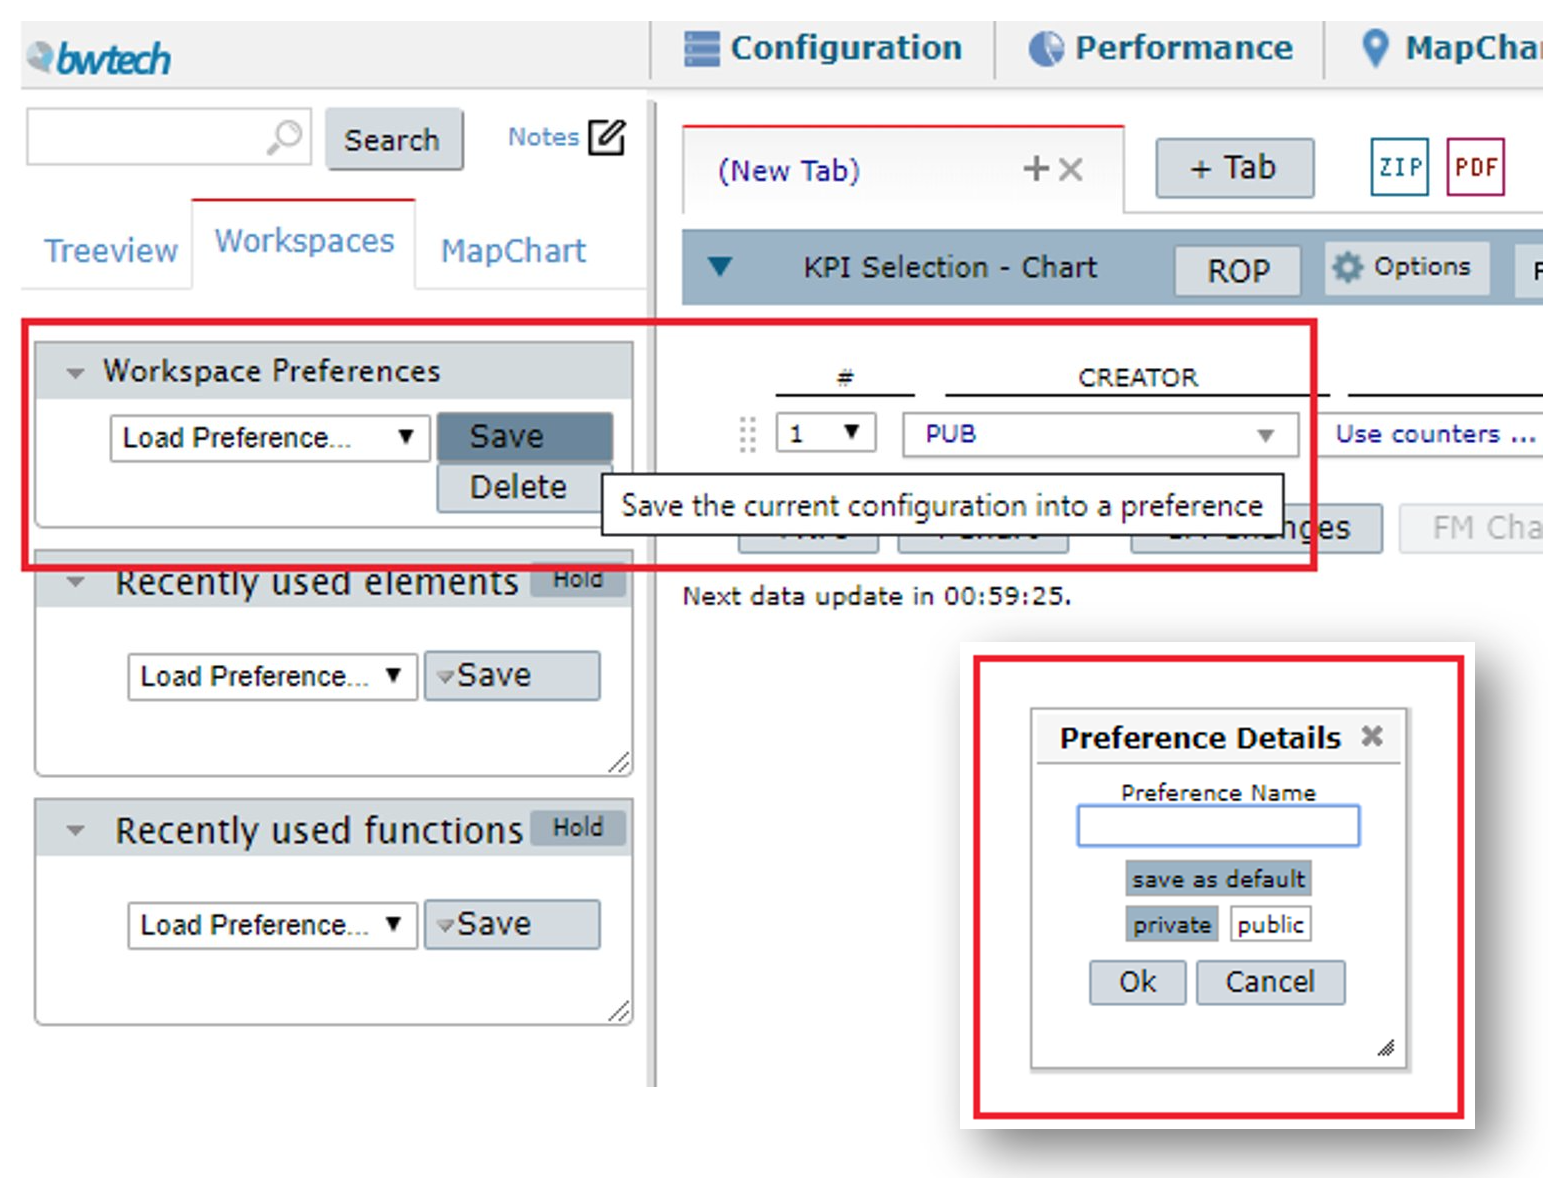
Select the Workspaces tab and choose Save. Define the Preference Details such as save as default, private or public.
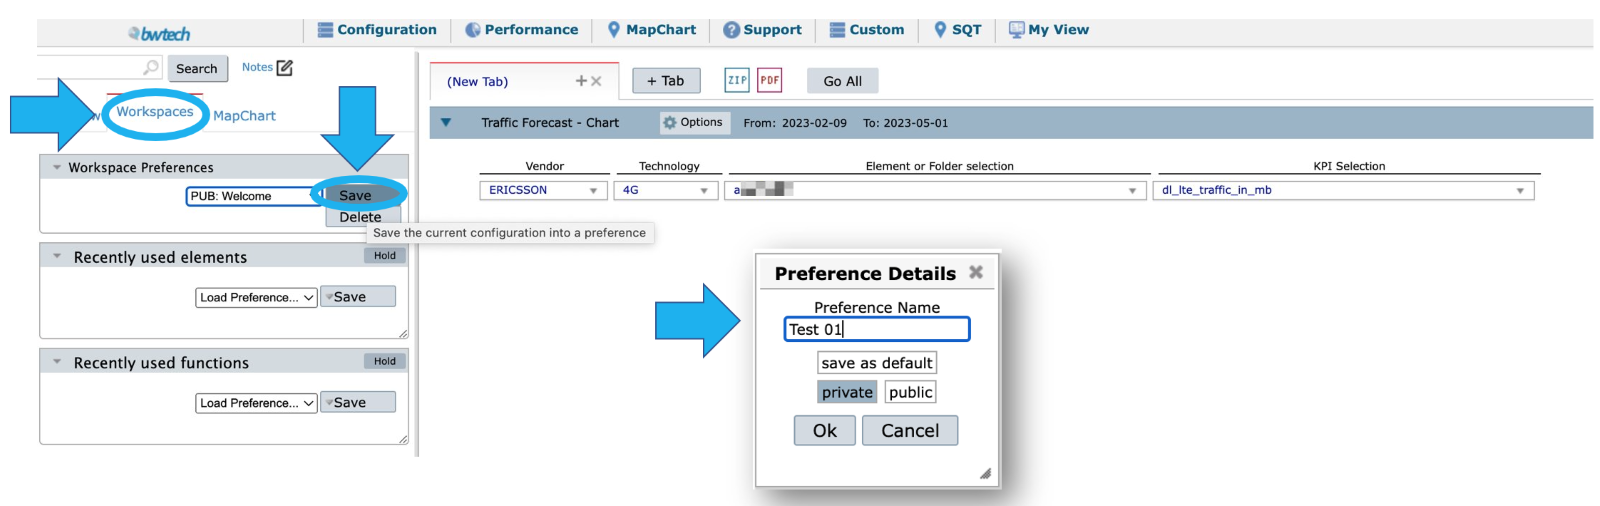
Go to the Workspaces Preferences menu to find and view your saved workspace.

Use cases
Create a workspace for data integrity monitoring
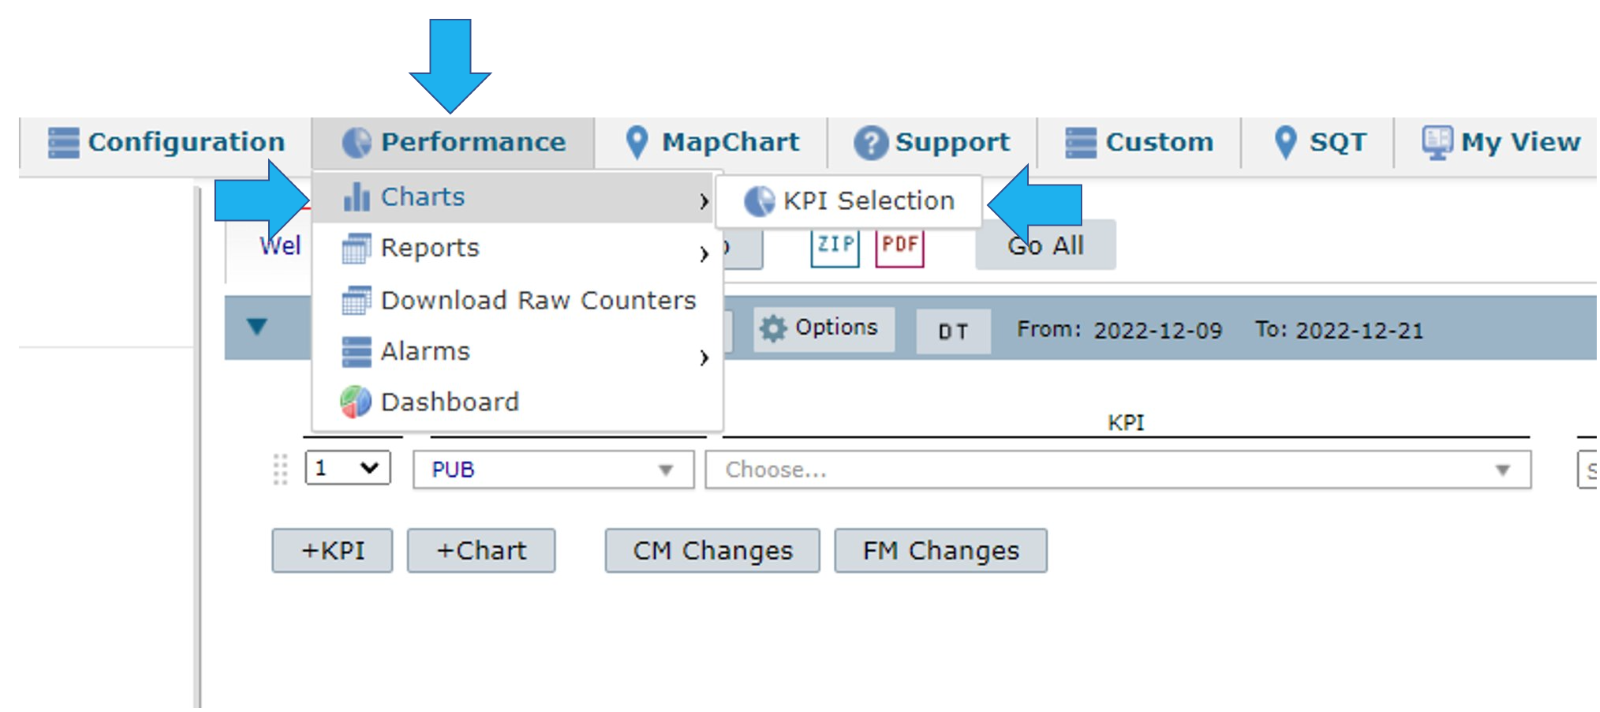
On the top menu, select Performance > Charts > KPI selection.
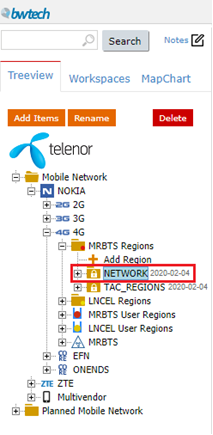
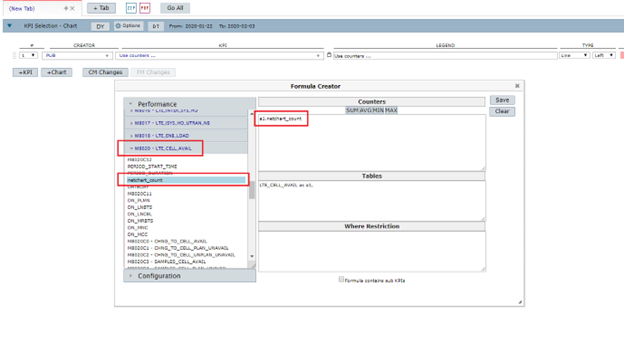
Select the folder where the table you want to monitor is. In this case, the selected folder was NOKIA > 4G > NETWORK.
Select Use counters on the KPI list.
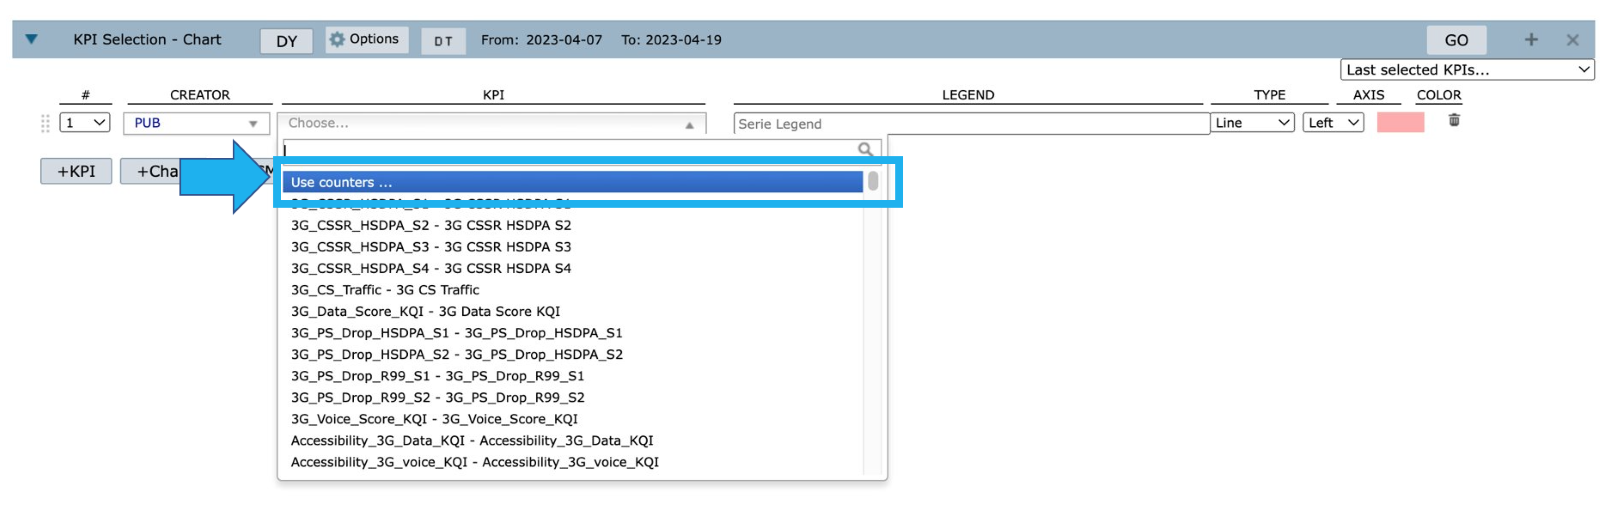
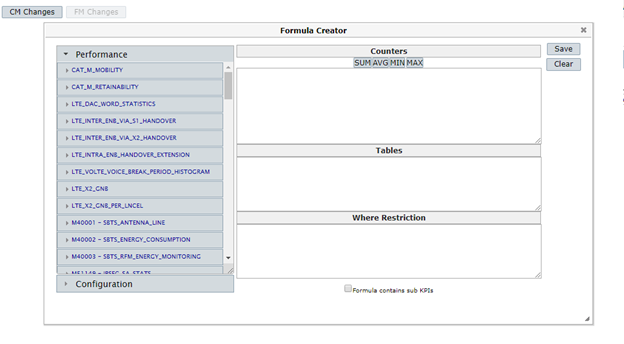
Select the option Use counters to define the formula to be used.

In the new window, search for the table whose data integrity you want to track.
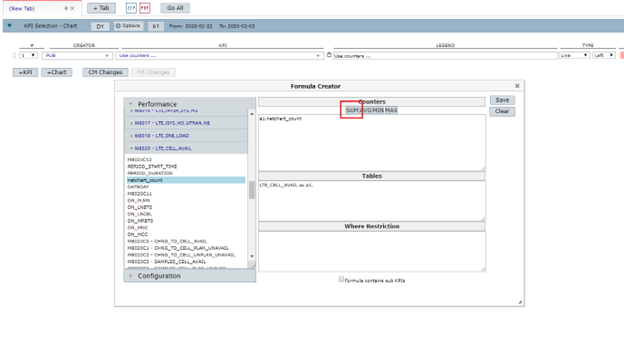
Locate and drag the counter netchart_count in the selected table. In this case, LTE_CEL_AVAIL.
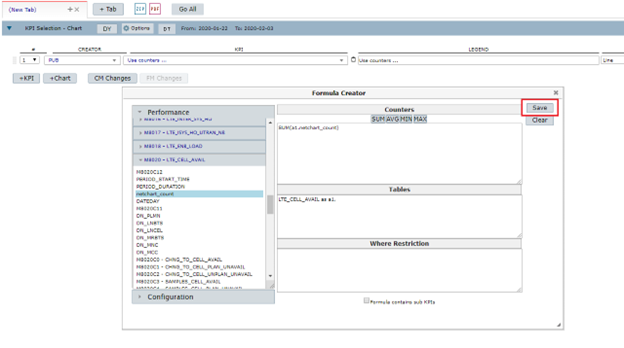
After that, select SUM and the formula SUM(a1.netchart_count) will be done.
NOTE: netchart_count is used for data integrity because each line in the database has the value one in the netchart_count field. Thus, it is the best way for checking data integrity.
Select Save.
Select the ROP option.
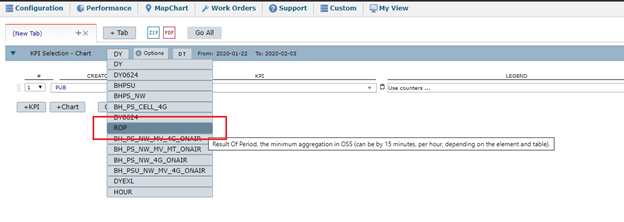
Choose the date you want to monitor.
NOTE: The interval between the dates will always be the same. This happens because NetChart uses the current date as a reference.
NOTE: For some technologies, we recommend using the option HOUR because ROP is not reported at the correct time.

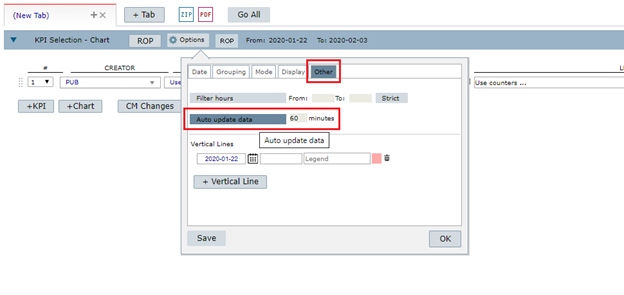
To make data integrity monitoring easier, activate the auto-update option located in the Other tab.
Name your new workspace and save it.
Tips
It is important to keep only the tabs, charts, reports and anything else you want to save open and close all the unnecessary tabs. When you select Save, NetChart will memorize everything in your workspace, including the treeview position.
The option Save as default is useful to show the workspace every time users access NetChart. The options private and public define if the workspace will be available only for the current user or to all users, always respecting the users’ permissions hierarchy.
Workspaces for Multivendor and User-Defined Data (UDD)
Monitoring multivendor and UDD data integrity is similar to monitoring vendors’ data integrity. So, to monitor multivendor and UDD, you must use a KPI that is already configured. The only difference is the selection of the KPI.
This means that you need to select the KPI Data_Integrity_UDD and then follow the other steps that were explained before.

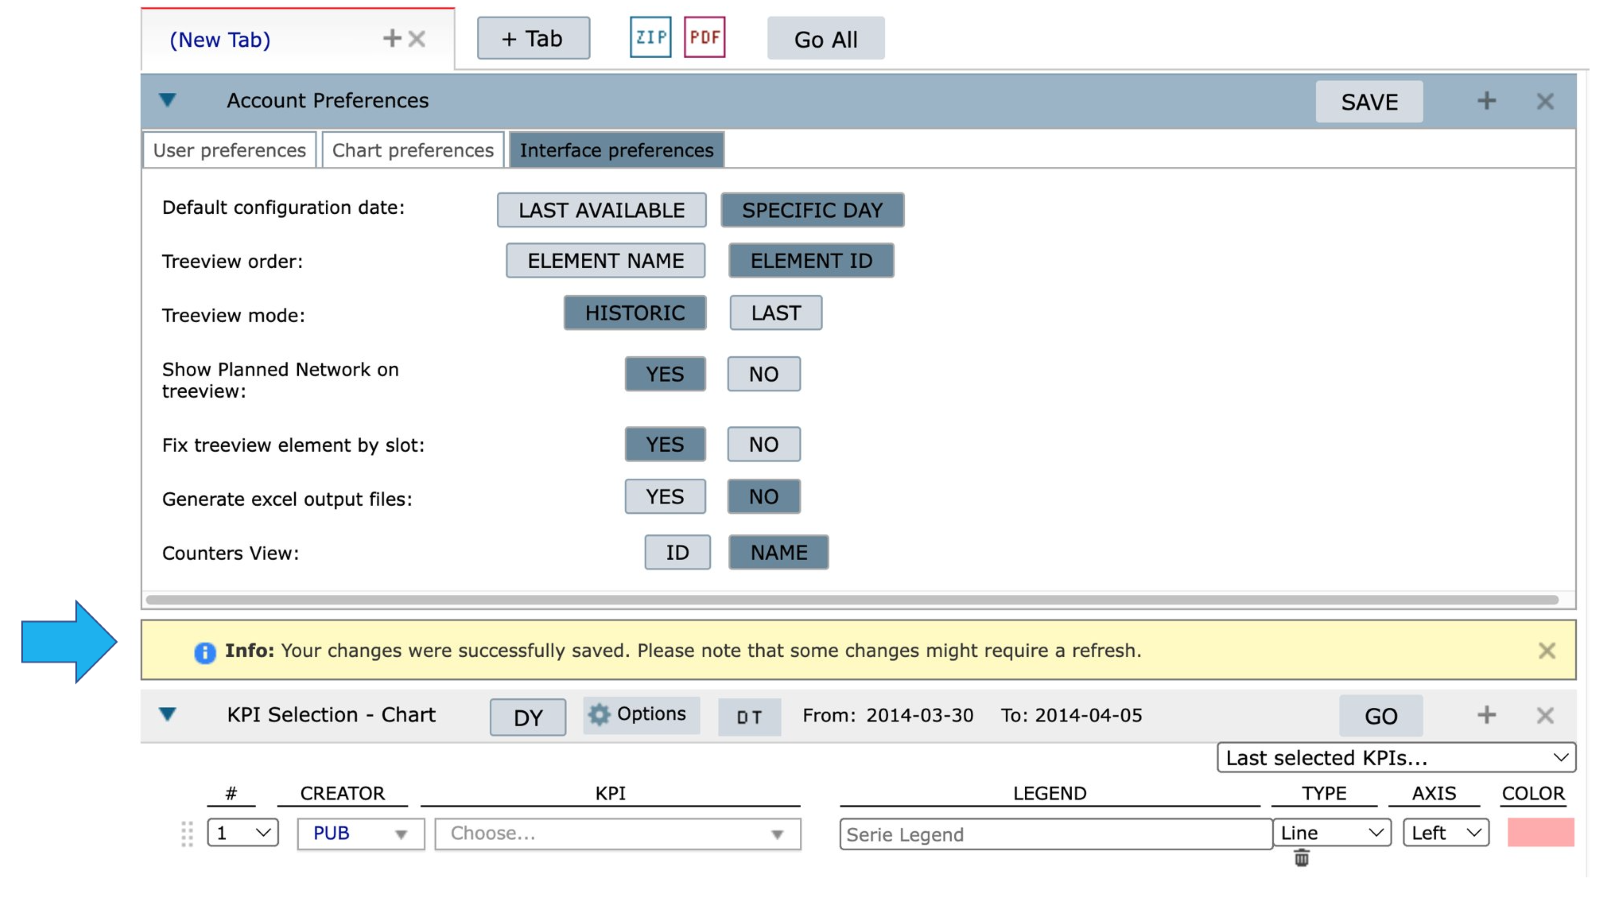
NOTE: Fix treeview element by a slot
The Workspace feature is impacted by the Interface Preference option Fix treeview element by a slot which allows you to define how the treeview selection will interfere with the function slots.
Select Preferences > Interface Preferences > Fix treeview element by a slot > YES or NO > SAVE.
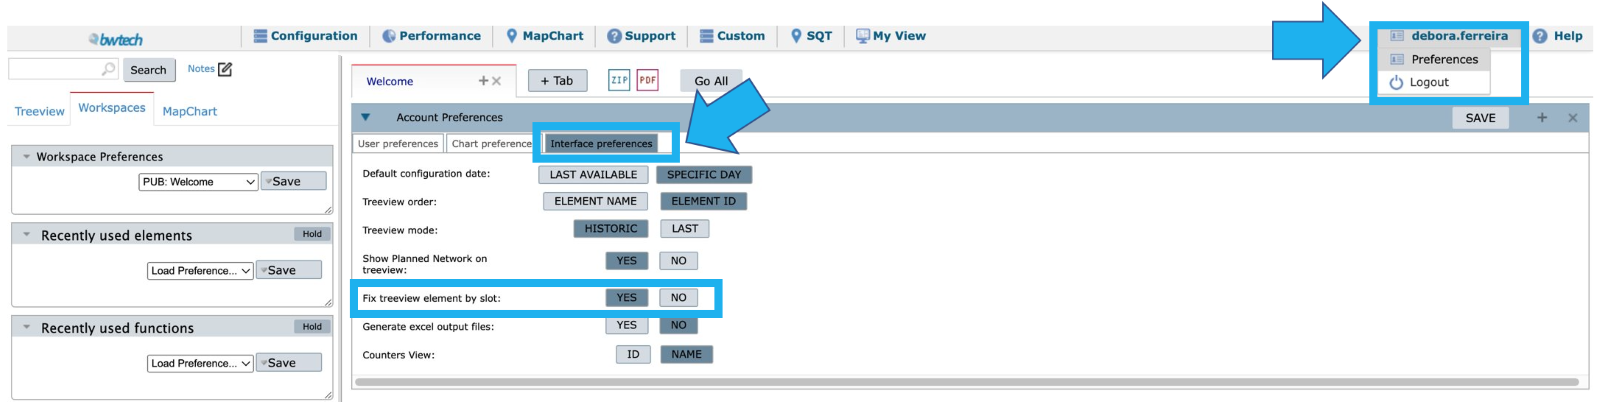
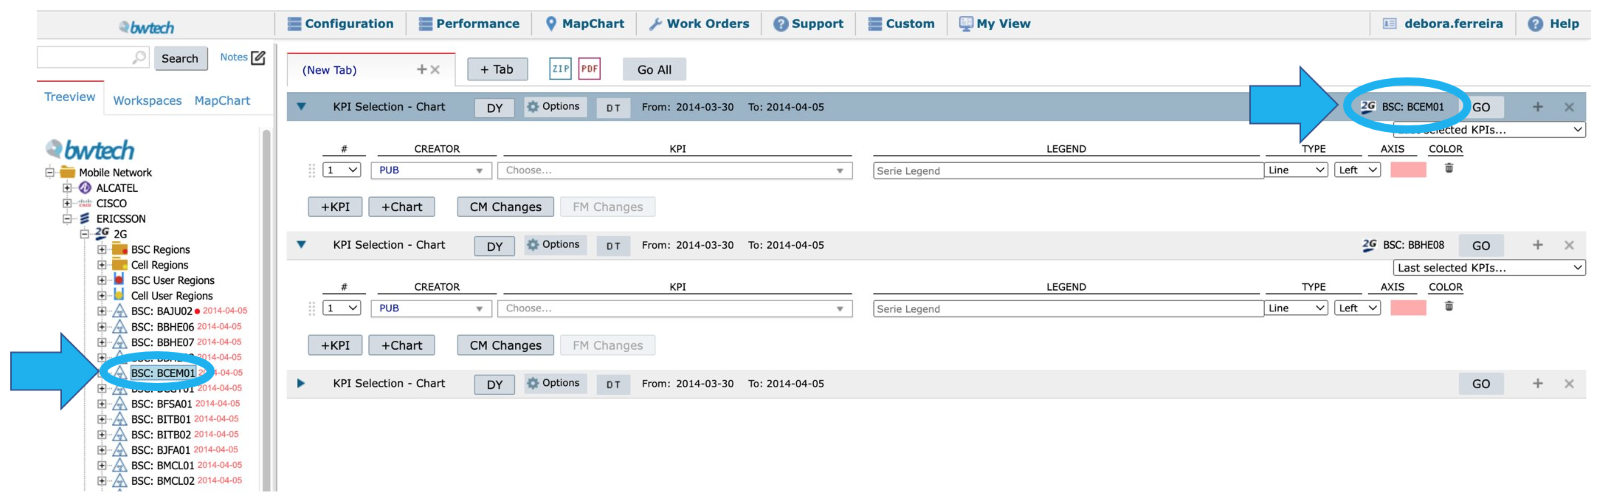
Select Yes to allow each function to consider a different selection in the treeview. With this configuration, the name of the element or folder that is being considered by the function will appear in the slot’s header right before the GO button.
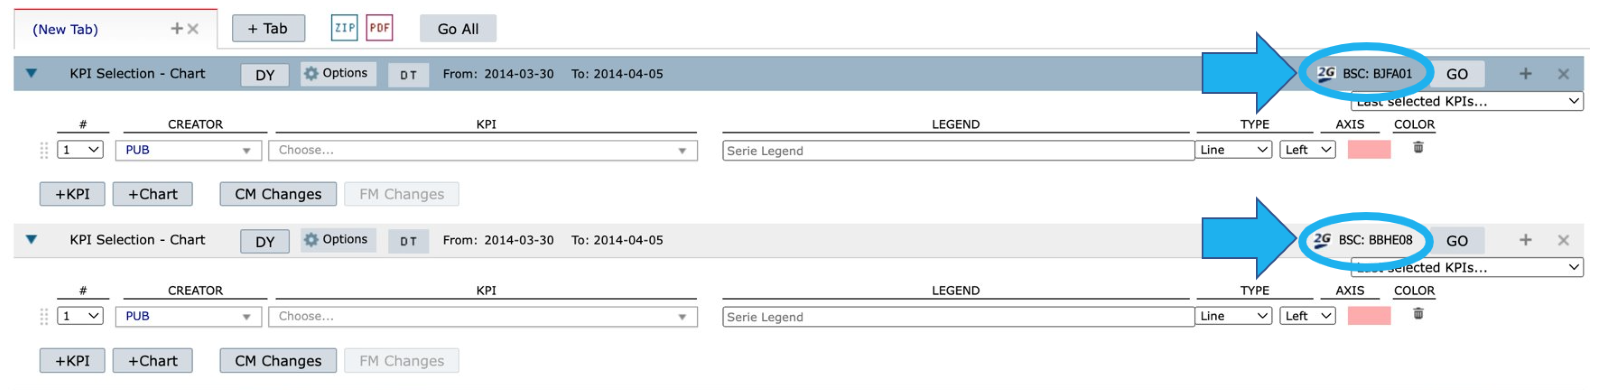
To change the element or folder, select the desired element or folder in the treeview and click over the current element’s name, right before the GO button.
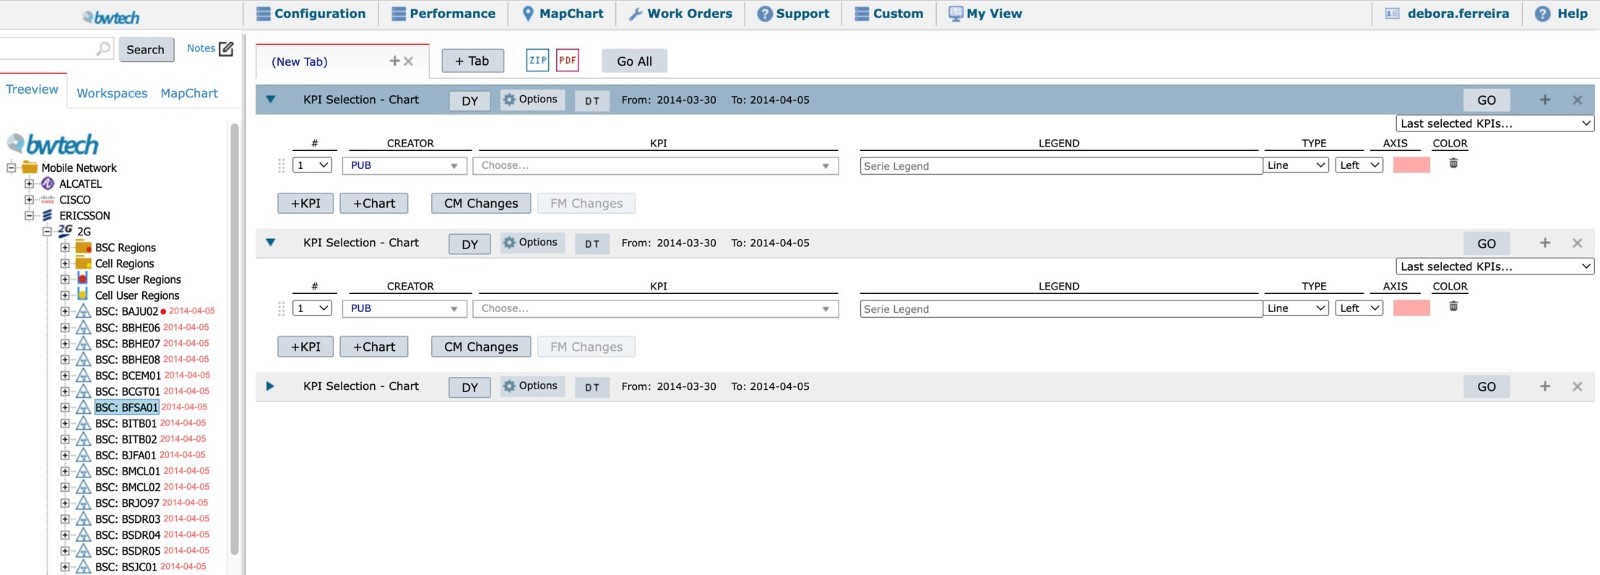
Select NO so that all function slots consider what is selected in the treeview. With this configuration, any change in the treeview selection will impact all function slots. Notice that, in this case, the element or folder’s name won’t appear before the GO button, since it corresponds to what you have selected in the treeview.
After saving this configuration, close the tab or refresh the page to apply the changes.