Contents
MANAGE REGIONS
OVERVIEW
You can group elements in folders, creating regions/clusters directly in the interface or importing a text file. The regions must follow the controller > site > cell hierarchy.
HOW TO USE
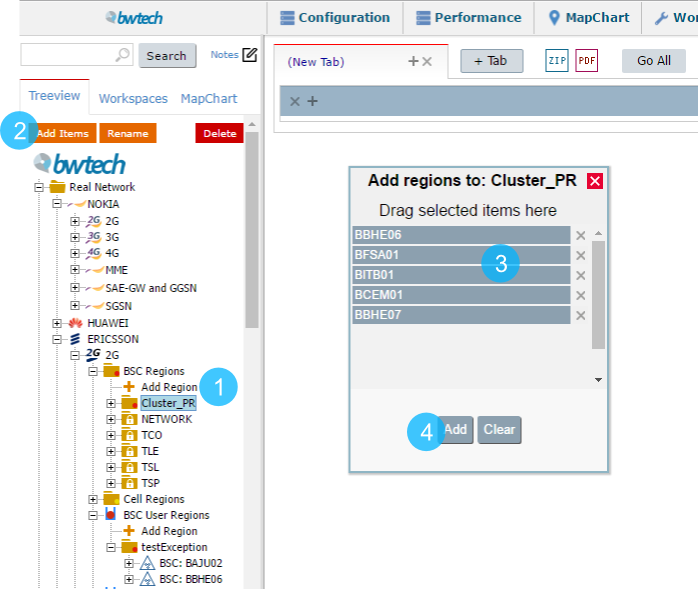
1 – First, select where you want to create a new region.
2 – Click on ADD and a new window will open.
3 – In this window, drag all the elements you want to include in the region.
4 – Then, click on ADD and your new region is created!
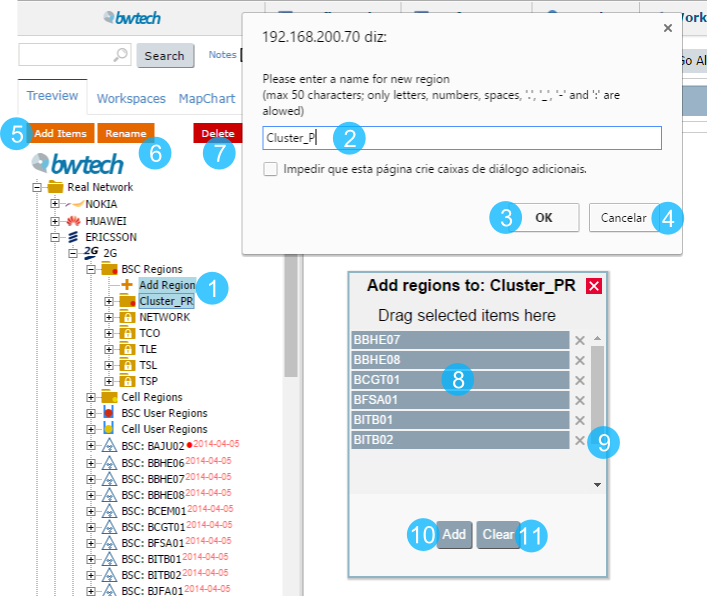
1 – Click + Add Region to create a folder to the new cluster.
The + Add Region button is available inside all Region Folders.
2 – Give a name to the cluster.
3 – Click OK to create the folder with the cluster name you created.
4 – Or cancel it.
5 – Click to Add Items to the created folder.
NOTE: This option is displayed only when a folder is selected.
6 – Click to Rename the folder.
NOTE: This option is displayed only when a folder is selected.
7 – Click to Delete the folder.
NOTE: This option is displayed only when a folder is selected.
8 – Select the elements in the treeview and drag them to the window.
NOTE: use the Ctrl button to select more than one element at a time.
9 – Click to delete one or more elements.
10 – Click Add to include the elements in the folder.
11 – Or Clear them.
TIPs
There are two macro types of regions in NetChart: public and private.
NOTE: Not all users have permission to create a public region.
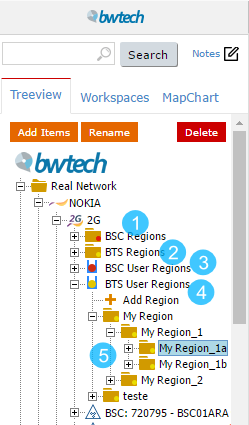
1 – Public Controller Regions. (BSC Regions, RNC Regions…)
2 – Public Cell Regions. (Cell Regions, BTS Regions, GCELL Regions…)
3 – Private Controller Regions. (User Regions)
4 – Private Cell Regions.
5 – To create regions inside an existing one, just click on the region that you want and click once more at Add Region.
FUNCTIONS DESCRIPTION
Creating Region importing text file: Custom > Import > Region
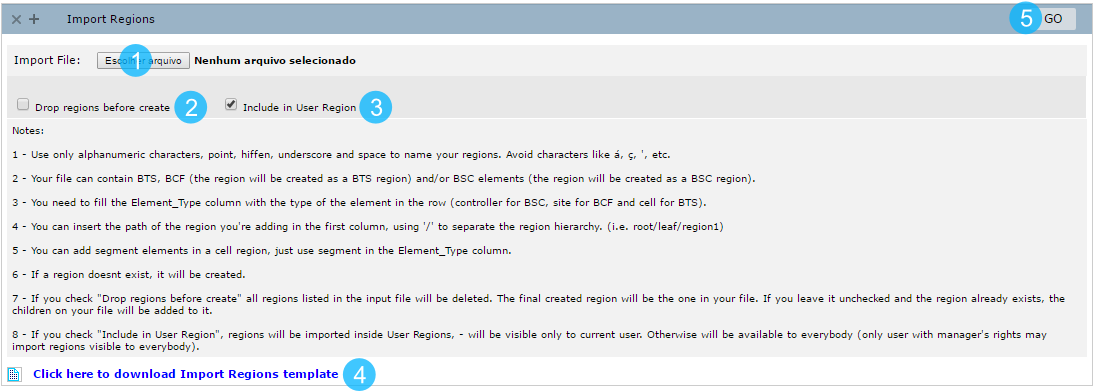
1 – Choose the text file template.
2 – Drop regions before create: if checked, all regions listed in the input file will be deleted. The final created region will be the one in your file. If you leave it unchecked and the region already exists, the children on your file will be added to it.
3 – Include in user regions: if checked, regions will be imported inside User Regions, – will be visible only to the current user. Otherwise, it will be available to everybody
PS: Only manage users may import public regions.
4 – Click to download the Import Regions template.
5 – Click GO to create the cluster.
Export Regions
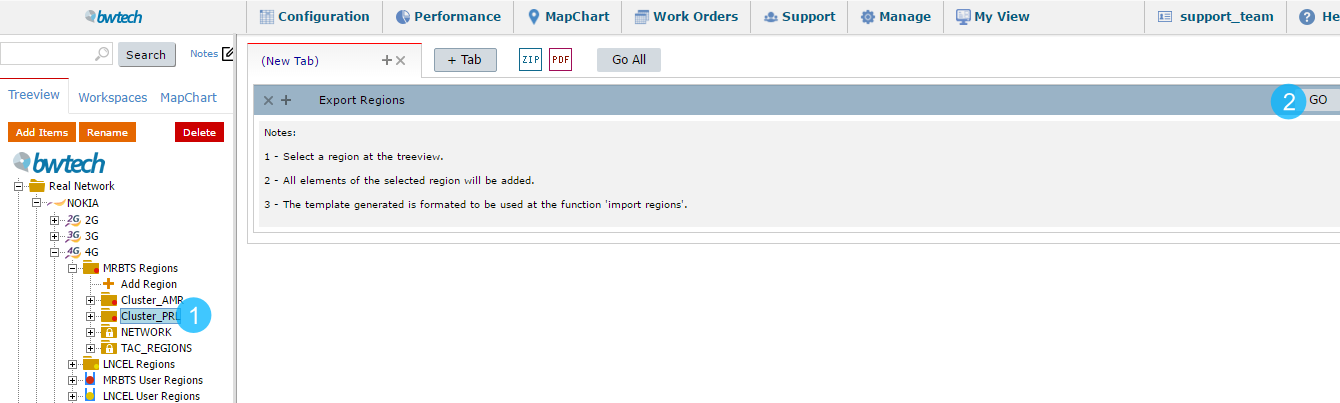
1 – Select in the treeview, the region that you want to export.
2 – Click GO to export it.
Creating Region with nonexistent elements
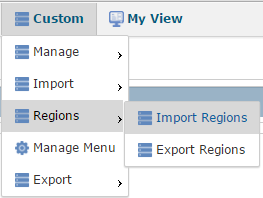
Custom > Regions > Import Regions
Select function Import Regions from the menu Custom > Regions > Import Regions.
Select input file for the region to be created, and check the option “Include nonexistent elements”.
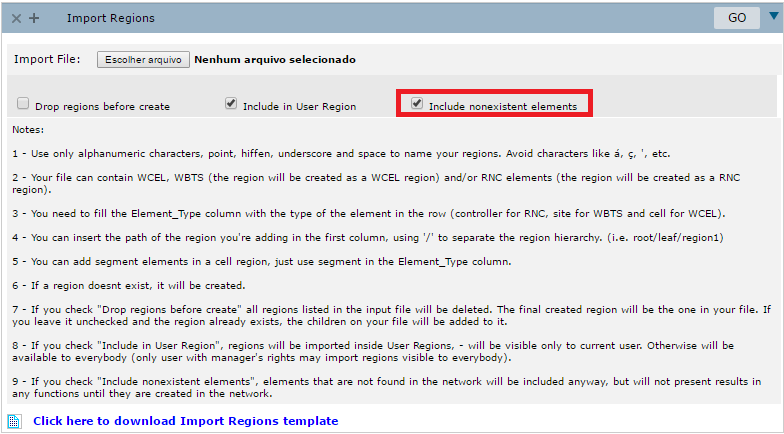
Elements that do not exist will be displayed in the region in grey, and they will not be present in the results of any NetChart functions.

NOTE: Every day the regions will be automatically updated. If the element is found in the database, it will be updated in the region.