Contents
Subscriber Complaints – CCD
OVERVIEW
With the main goal to control the workflow inside the client, the Work Orders feature is a tool that helps not only to control tickets but also allows the optimization of the work and the client’s routines.
HOW TO USE
The Work Orders feature has a simple and clean interface. Through it, the CCD team can create tickets with the subscriber complaints, see its status, comments made, SLA time and more. There is also the possibility to close the tickets or return them to the NOC team to continue to work on the solution (when it is a network demand).
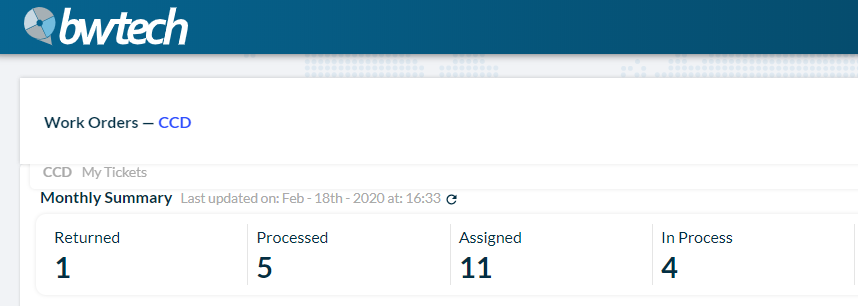
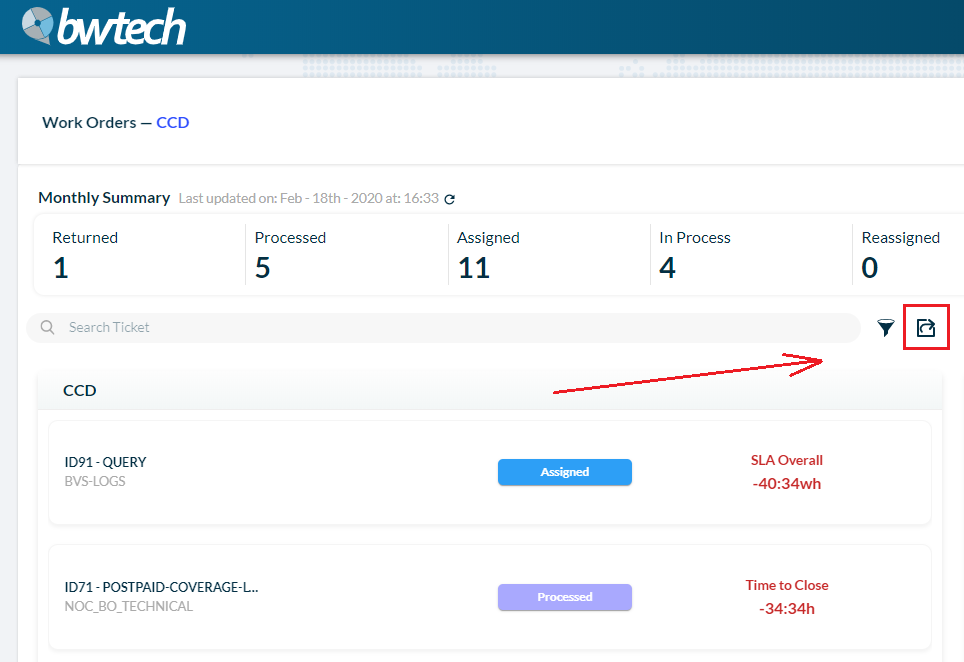
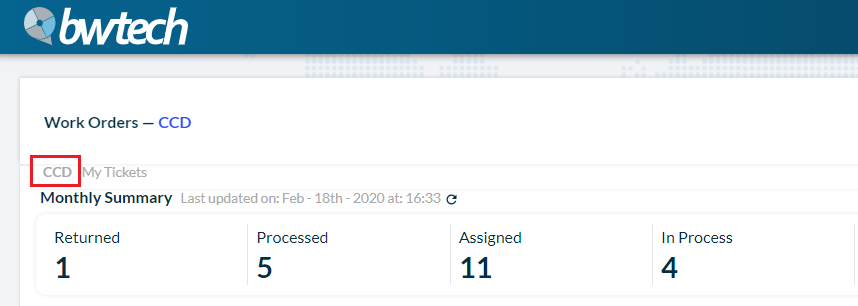
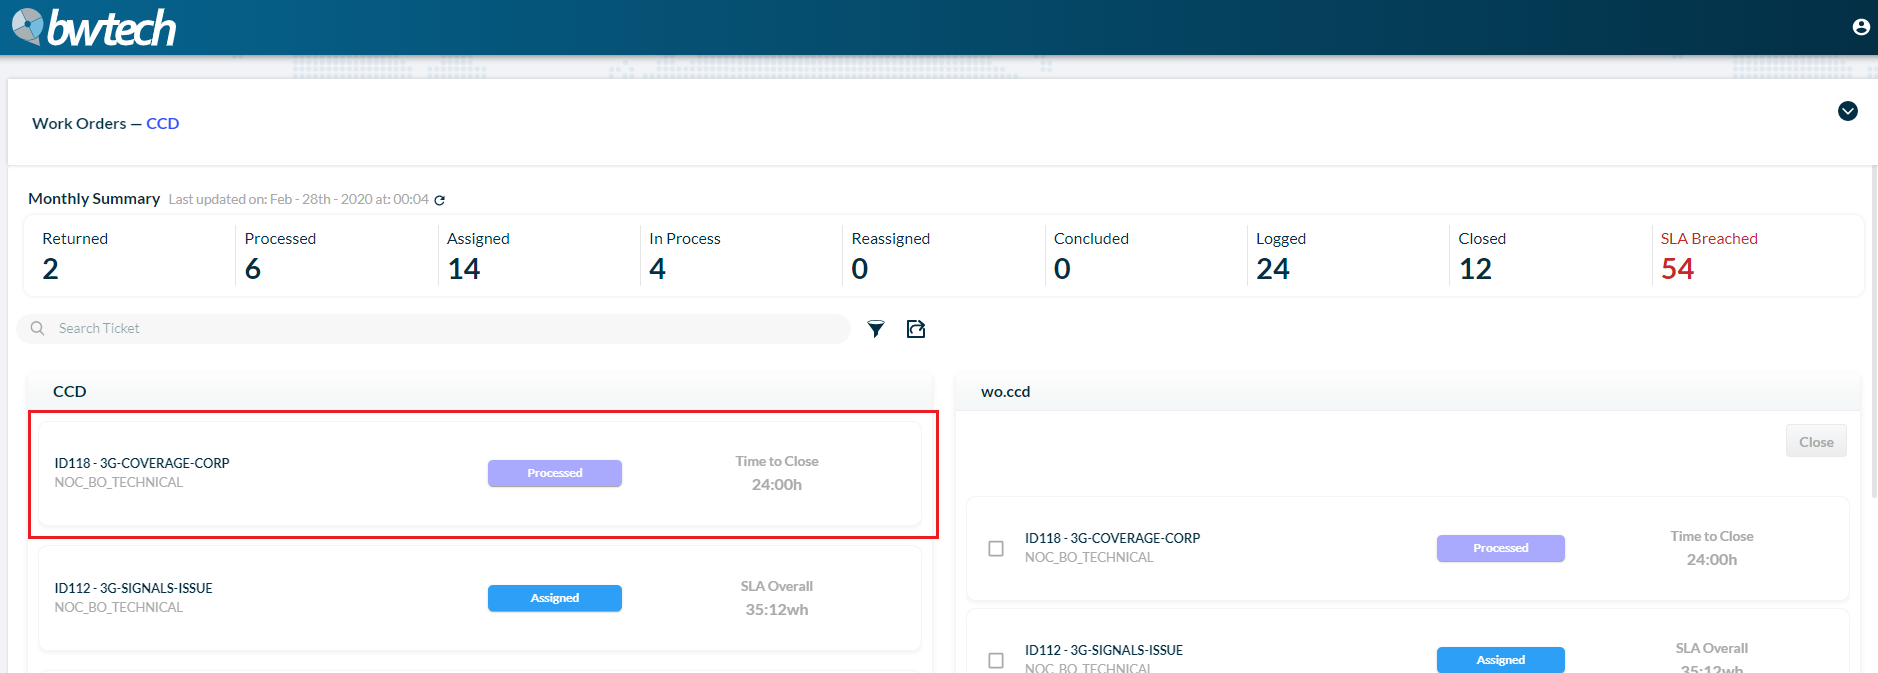
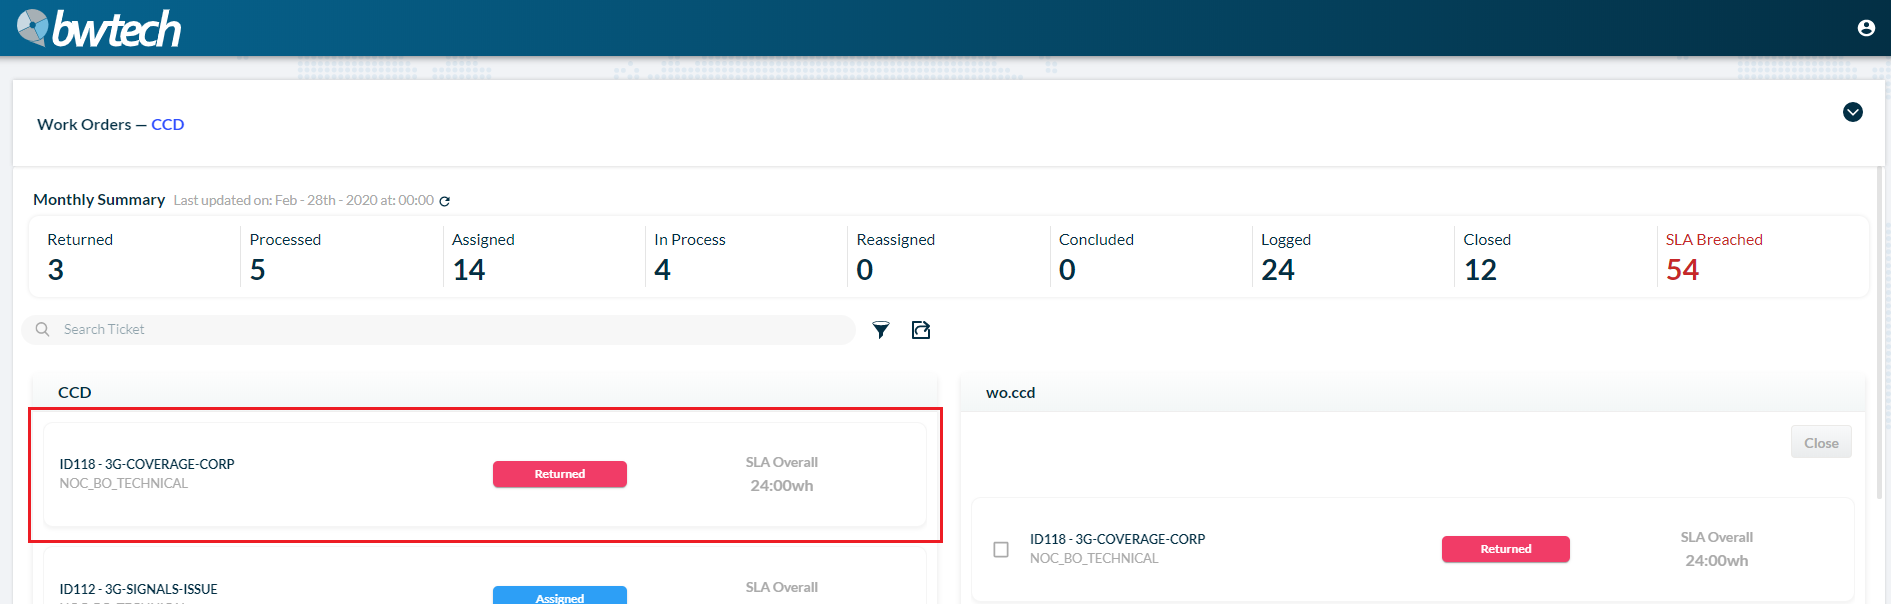
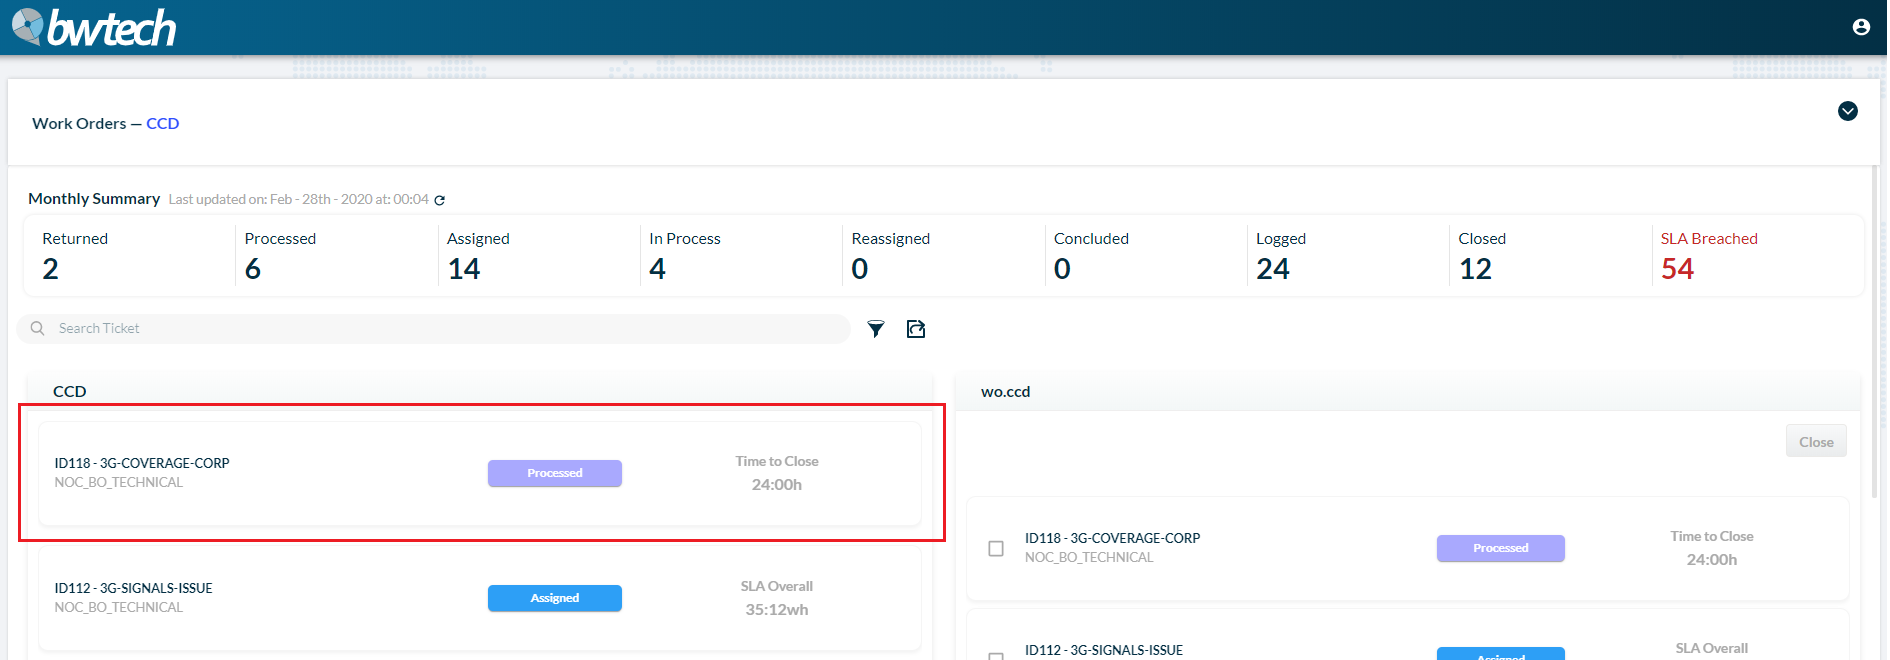
On the main page, the user has an overview of the tickets and their status: returned, processed, assigned, in process, concluded, logged, closed and how many had their SLA breached.
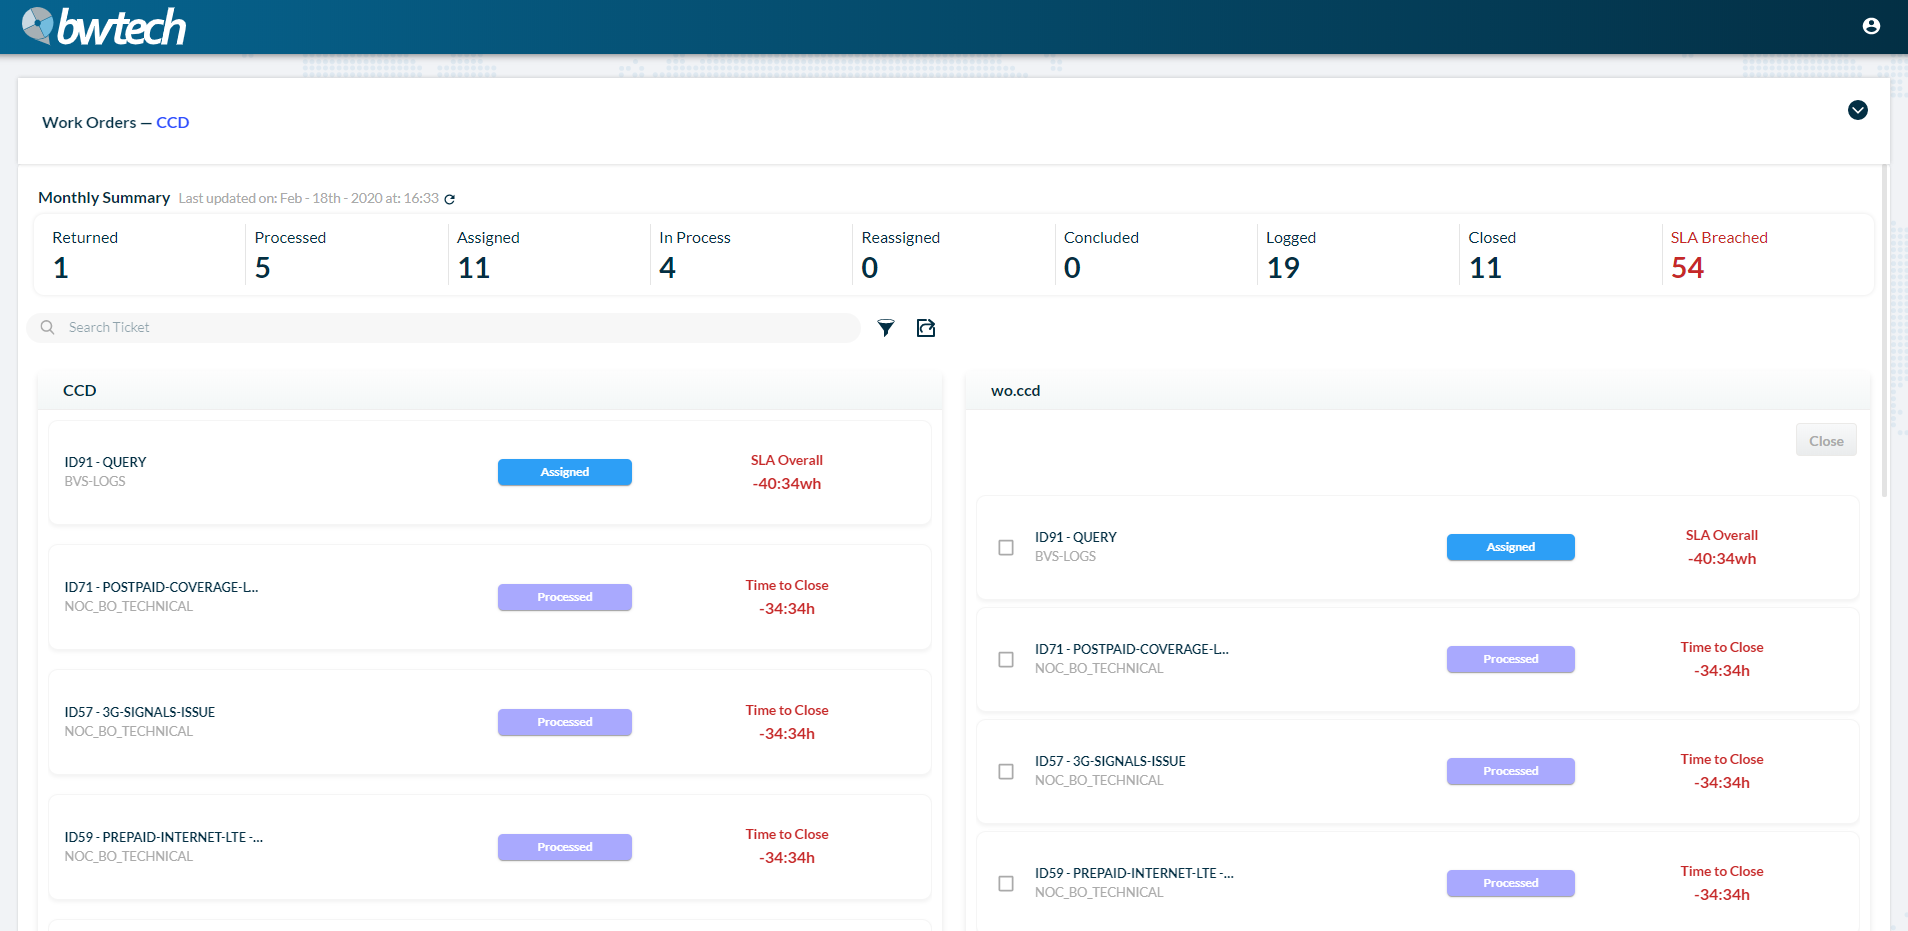
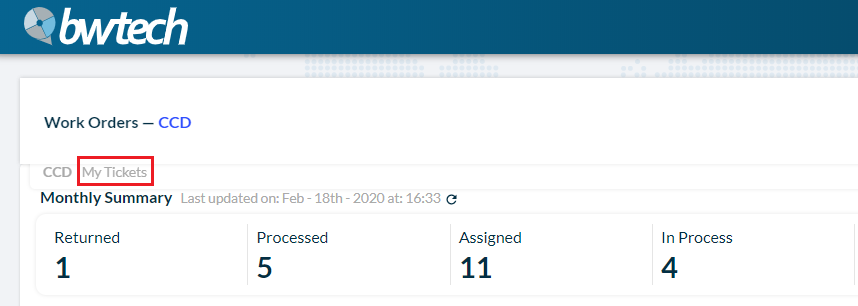
1 – On the menu bar you can choose on which page you want to navigate. In CCD’s page, you can close or return tickets. And on My Ticket’s page, you can create tickets.
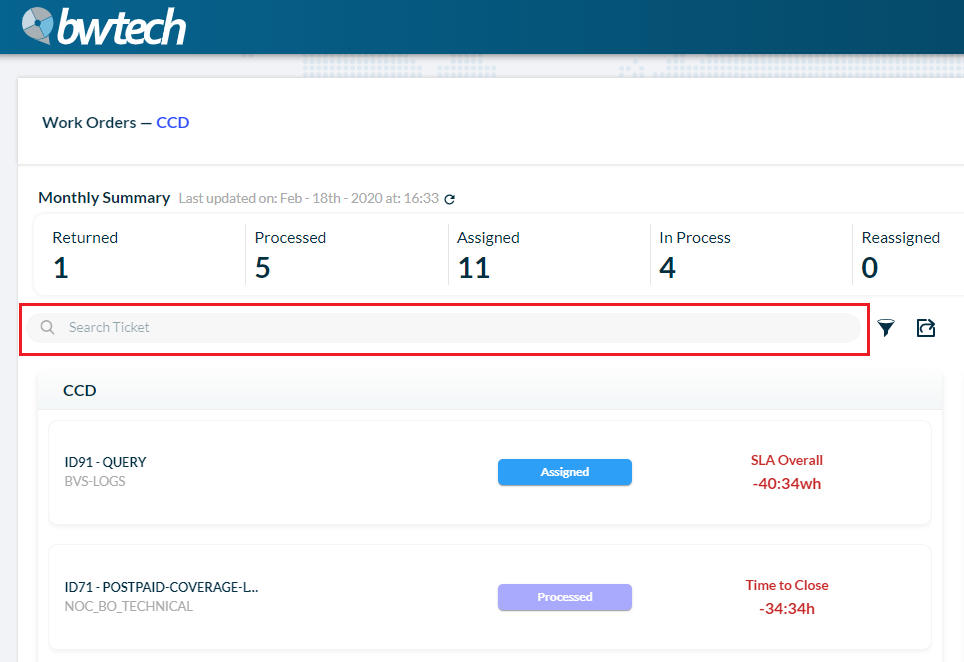
2 – To find a ticket, you can use the search bar.
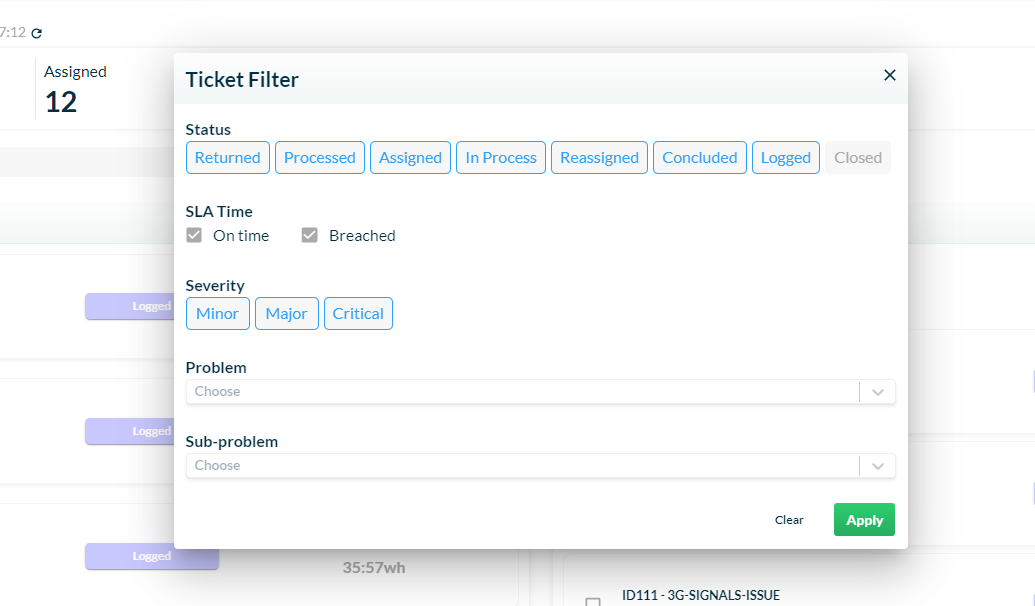
3 – And to refine your results, use the filter tool.
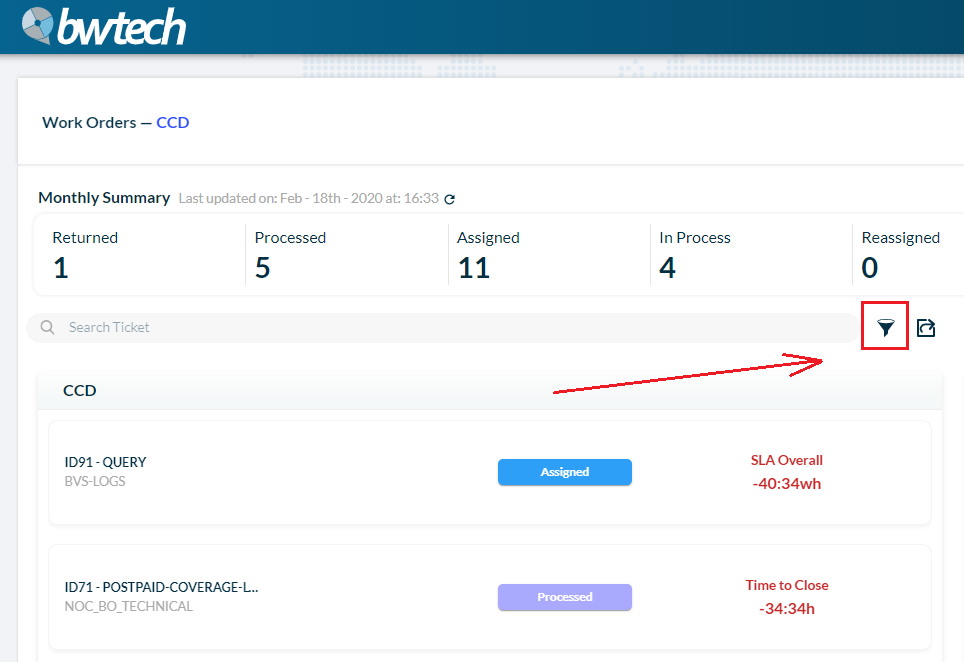
Through the filter tool, you can filter the results by status, SLA time, severity, problem or sub-problem:
4 – You also have the option to export your data to an Excel file. Just click on the Export icon (shown in the image below) and the document will be downloaded.
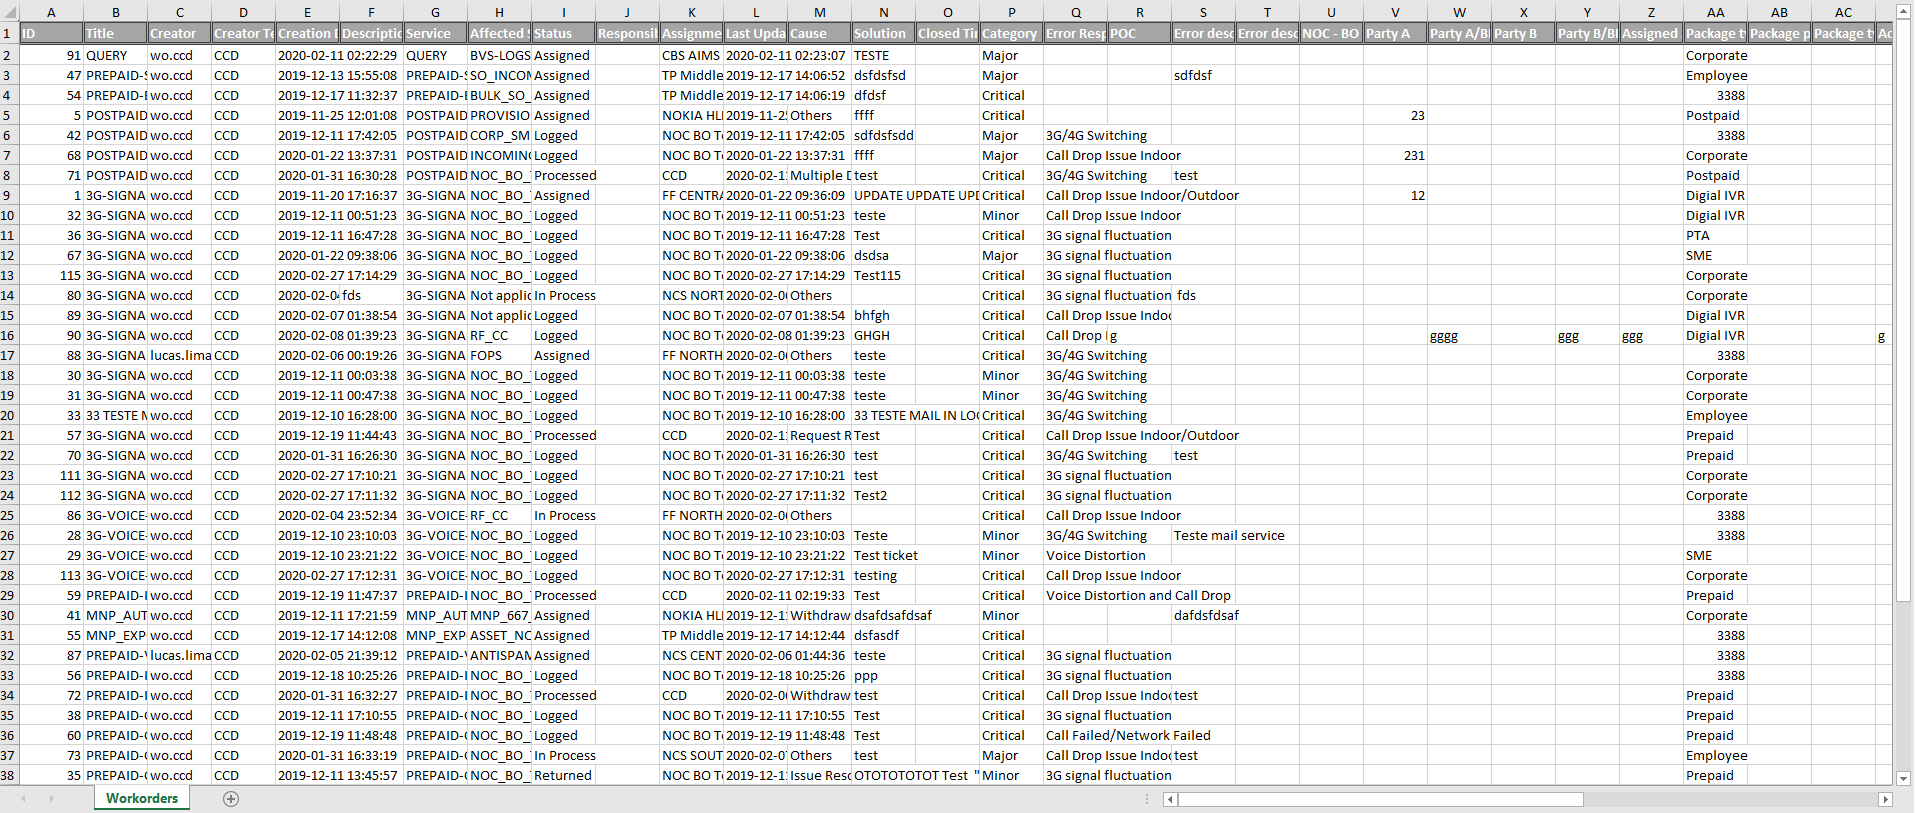
Example of an Excel file:
User flows
In the Work Orders feature, there are two main types of subscriber complaints tickets: IT and NW. Each one has its unique user flow inside the system with a specific status. On the images below, you can see the NW and IT flows and what each ticket status means:


USE CASES
Creating a ticket
1 – On the menu, click on My Tickets.
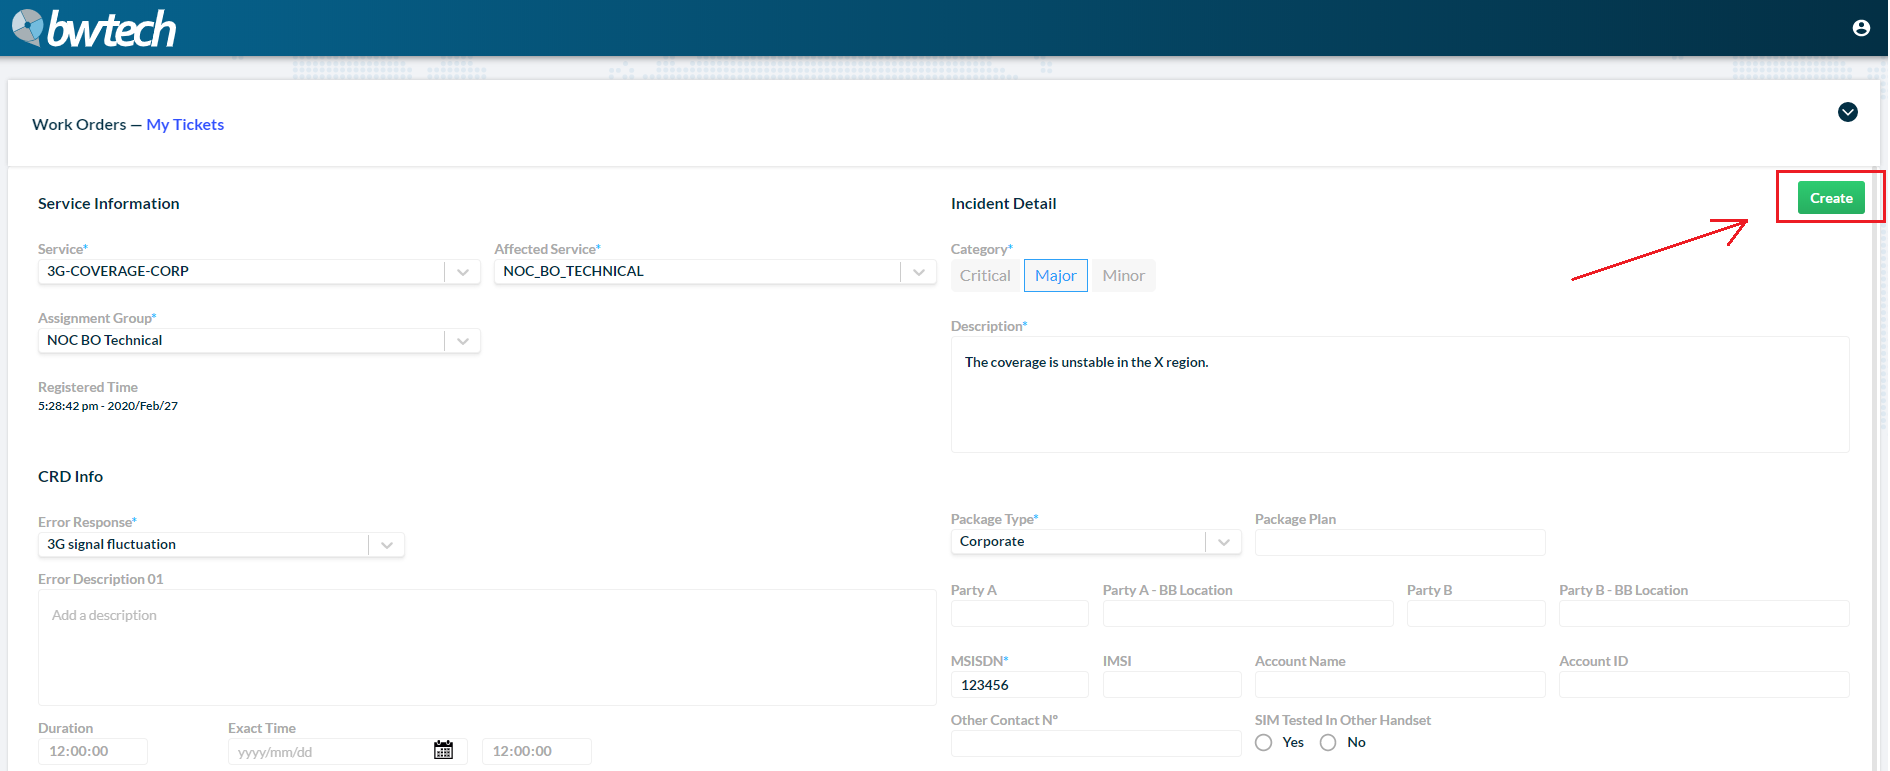
2 – Now it is time to fill in the ticket form:
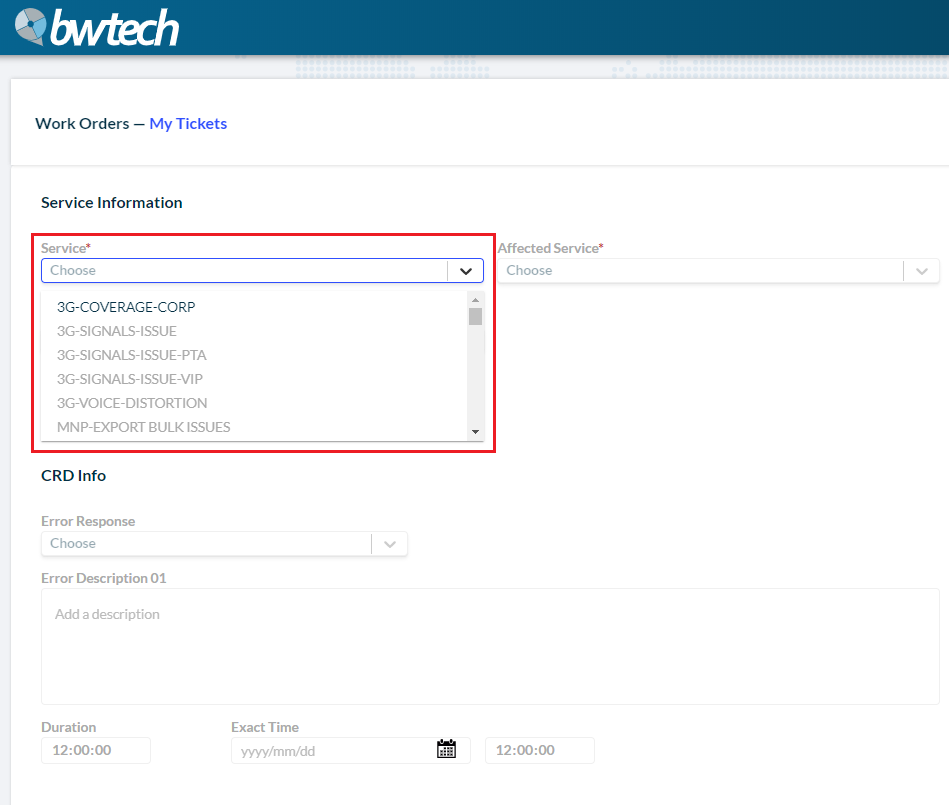
A – Choose the service.
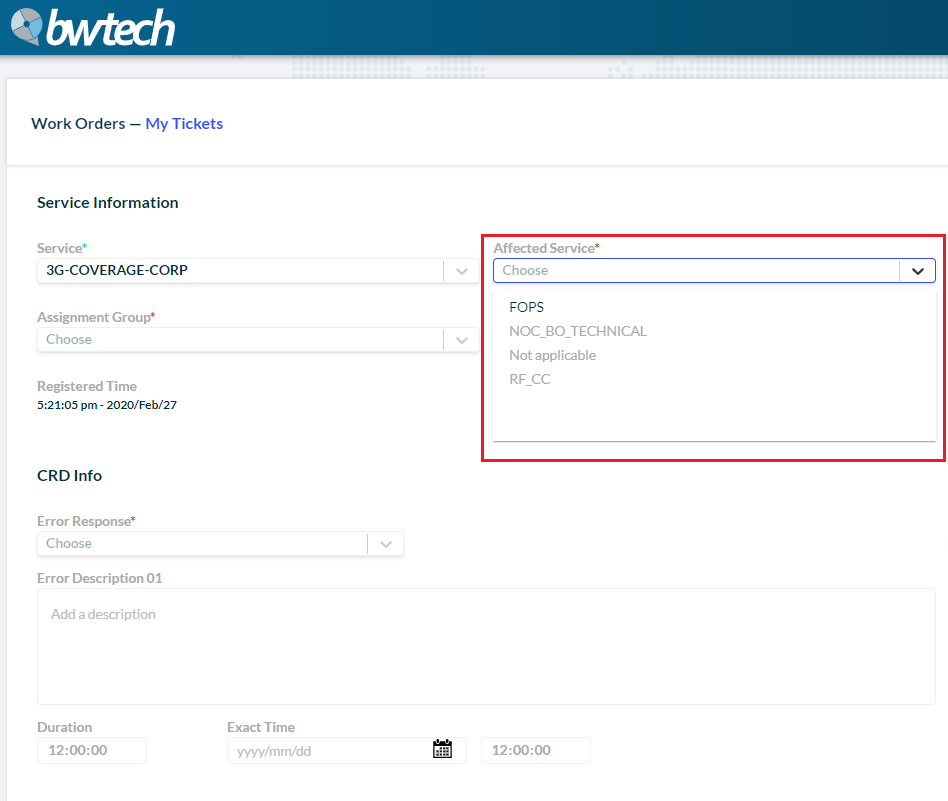
B – The Affected Service.
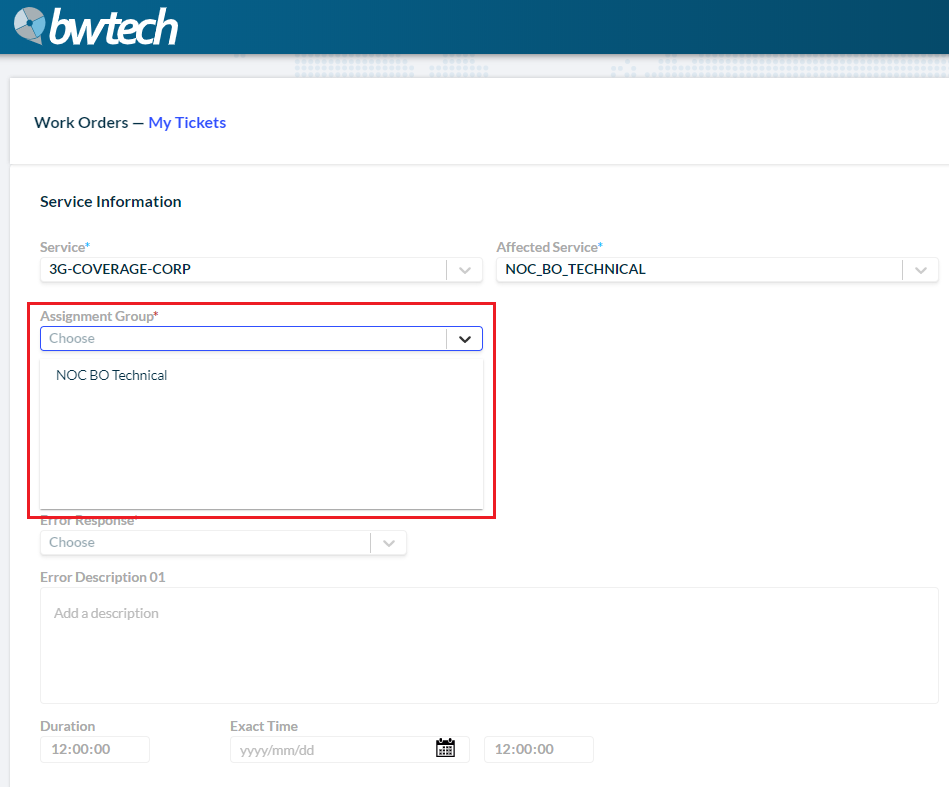
C – The Assignment Group.
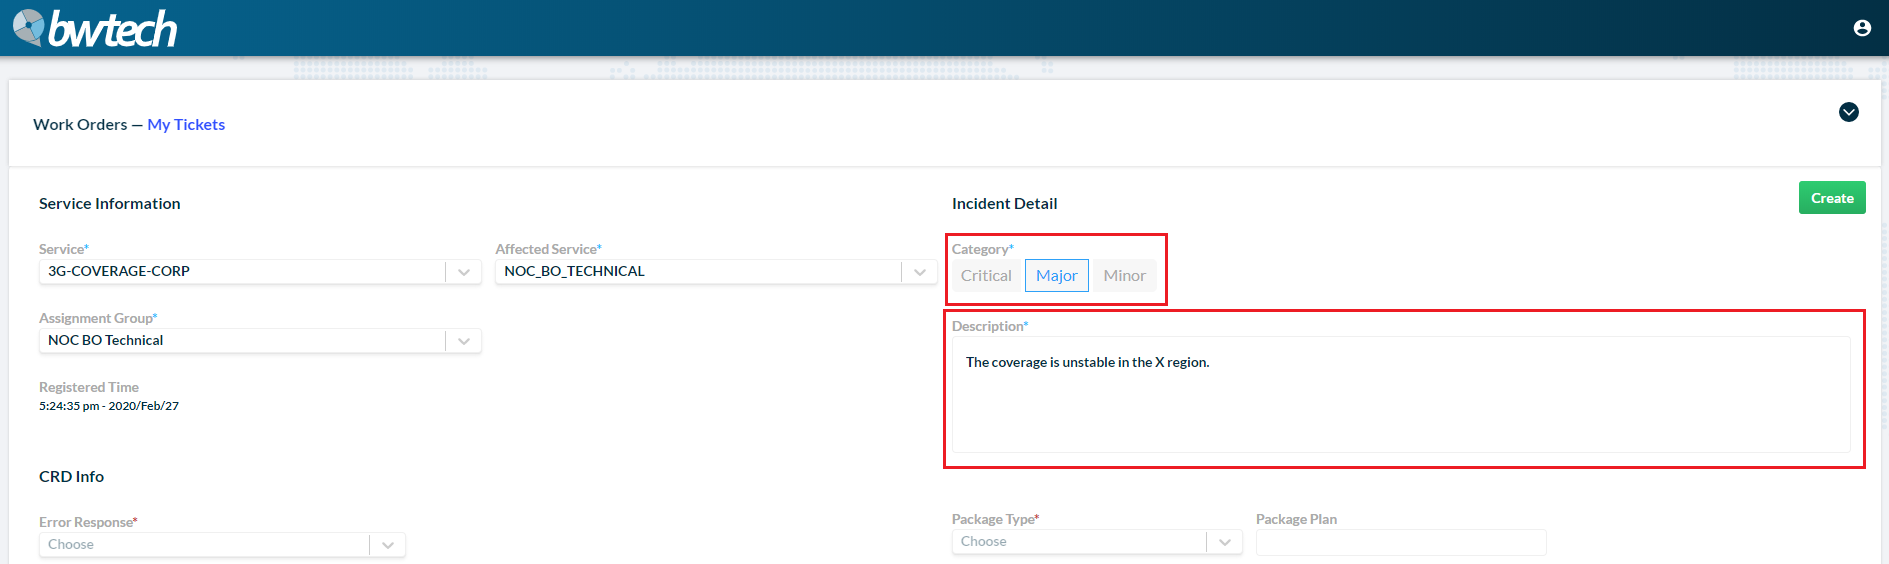
D – Select the category of the incident and write a description of what happened.
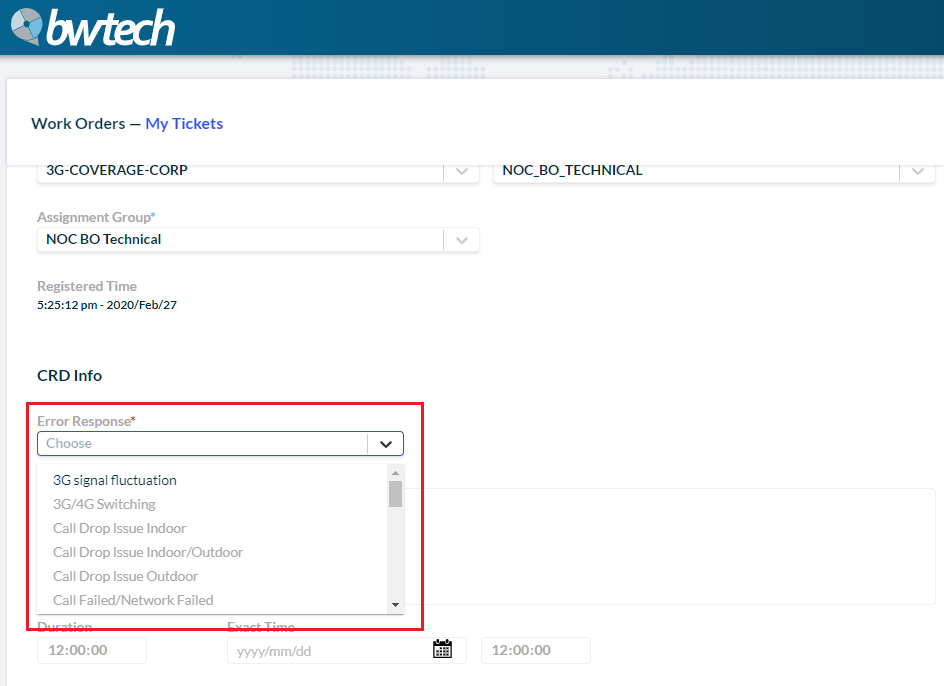
E – On the CRD Info, choose the Error Response.
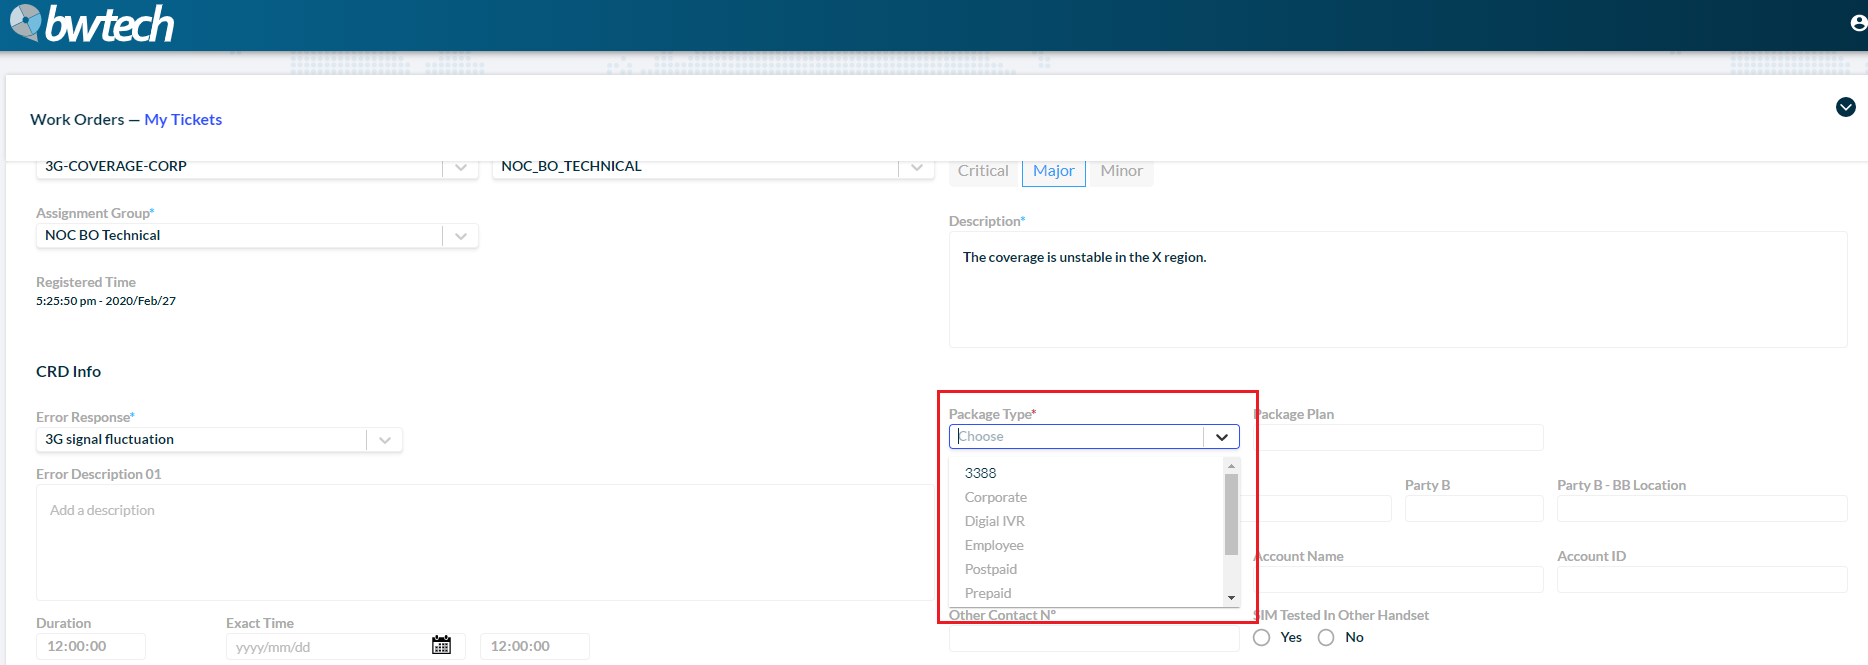
F – Choose the Package Type.
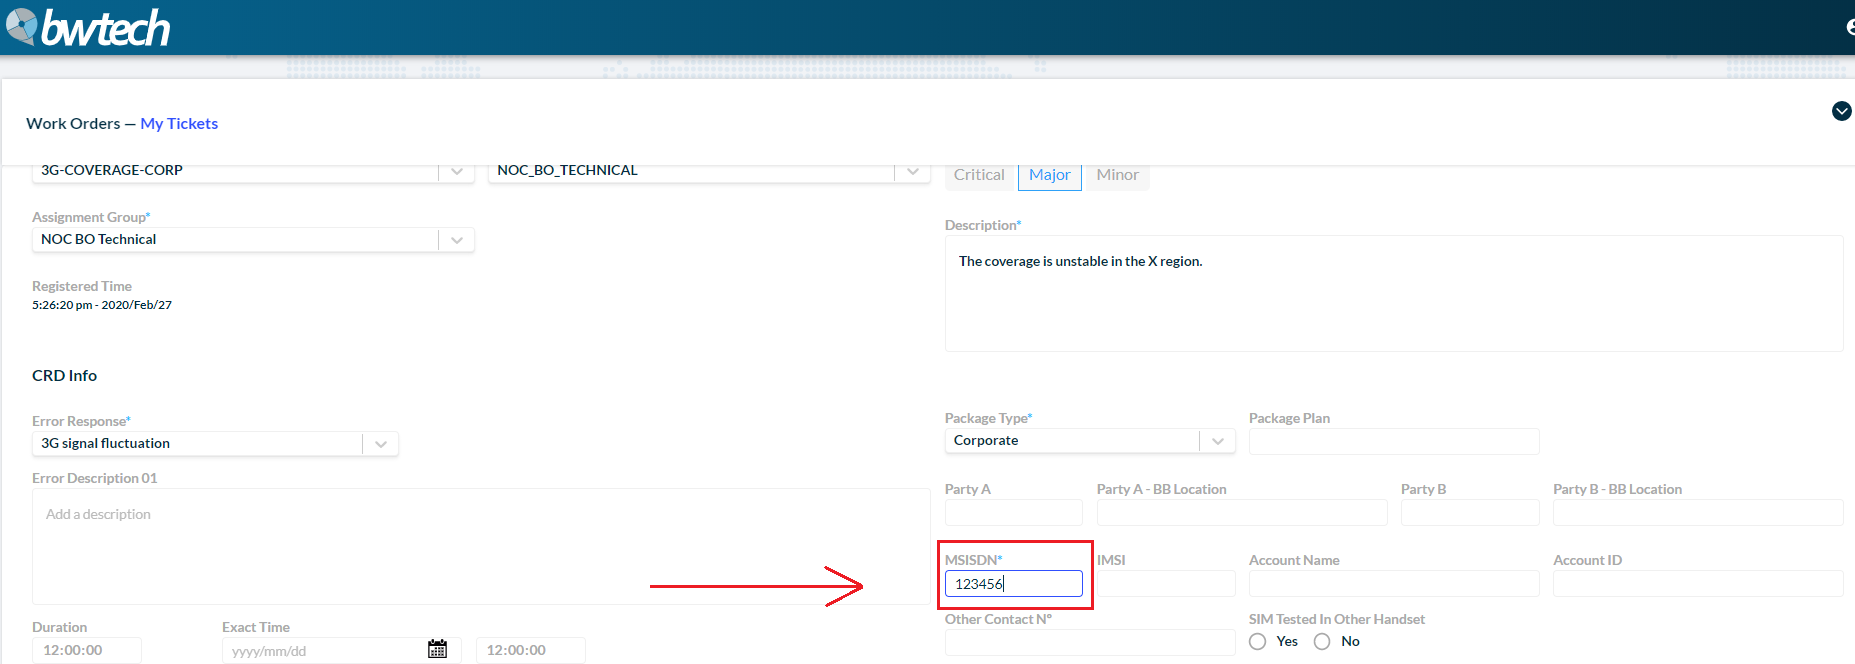
G – And put on the MSISDN number.
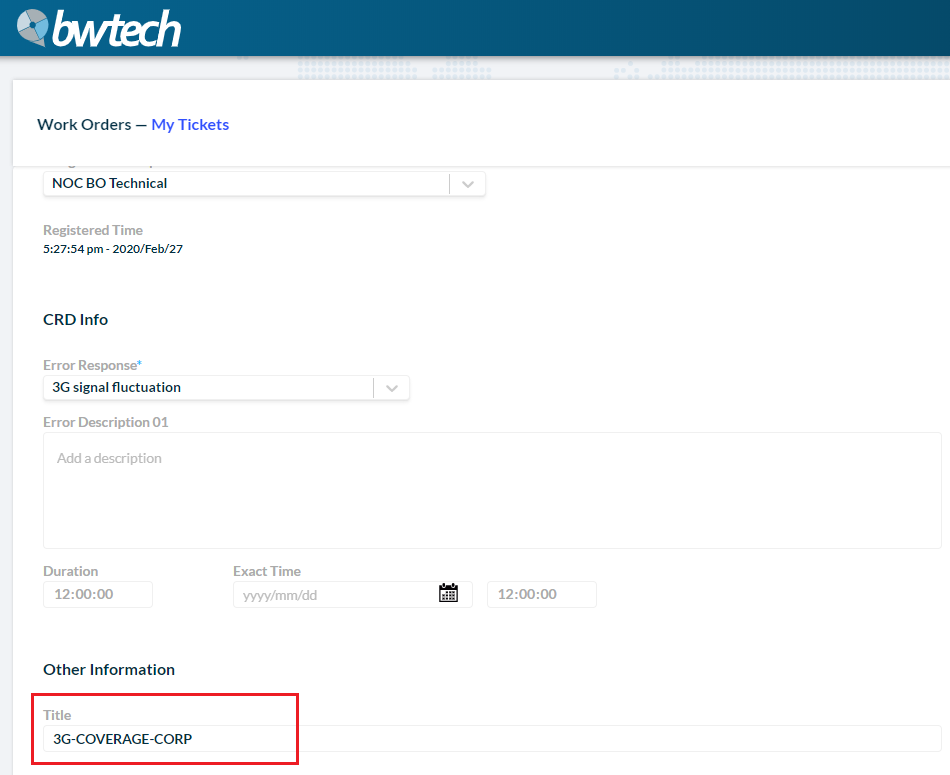
H – The ticket title will be filled automatically, but you can change it if you want.
I – Now add the FLM/Solution needed.
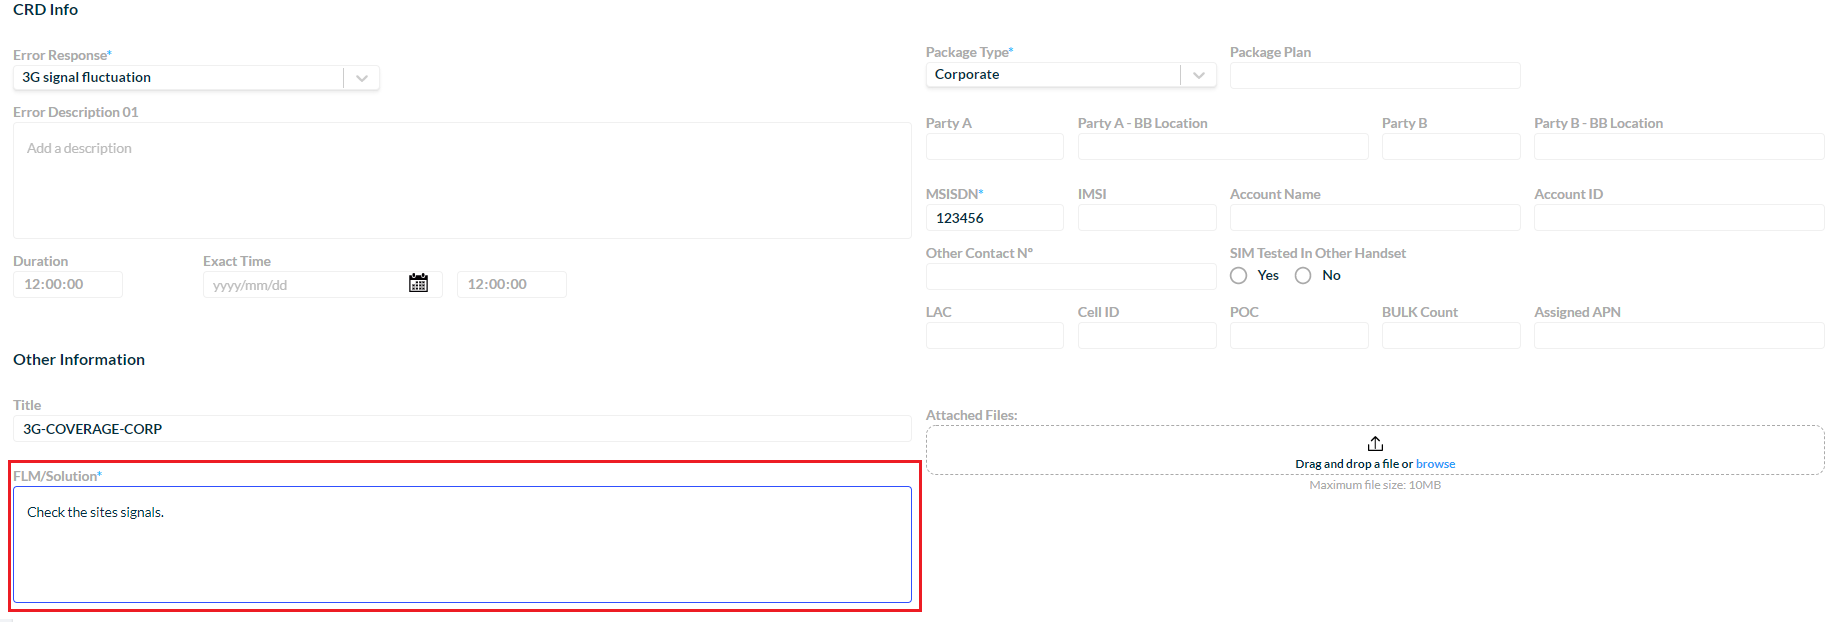
J – You can also attach files.
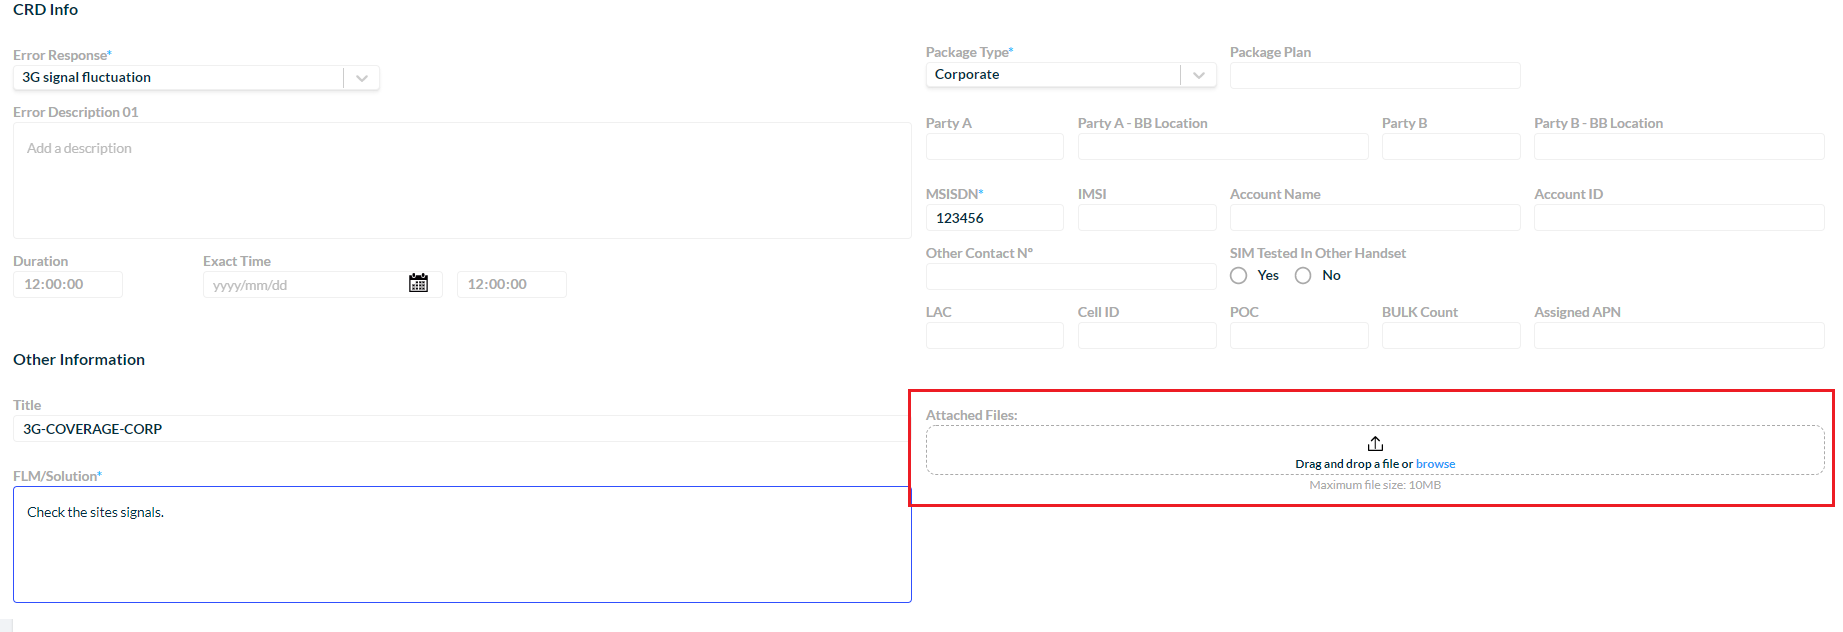
K – And fill the other information fields if you think it is necessary.
NOTE: The more information and data you give, the better it is to the NOC and SLM teams. This means they will have more knowledge of the ticket/problem and it will help with the solution.
3 – With the ticket information filled, just click on the Create button.
4 – And you’re done! Your ticket is now created and it will appear not only on your panel but also in the assigned group panel.
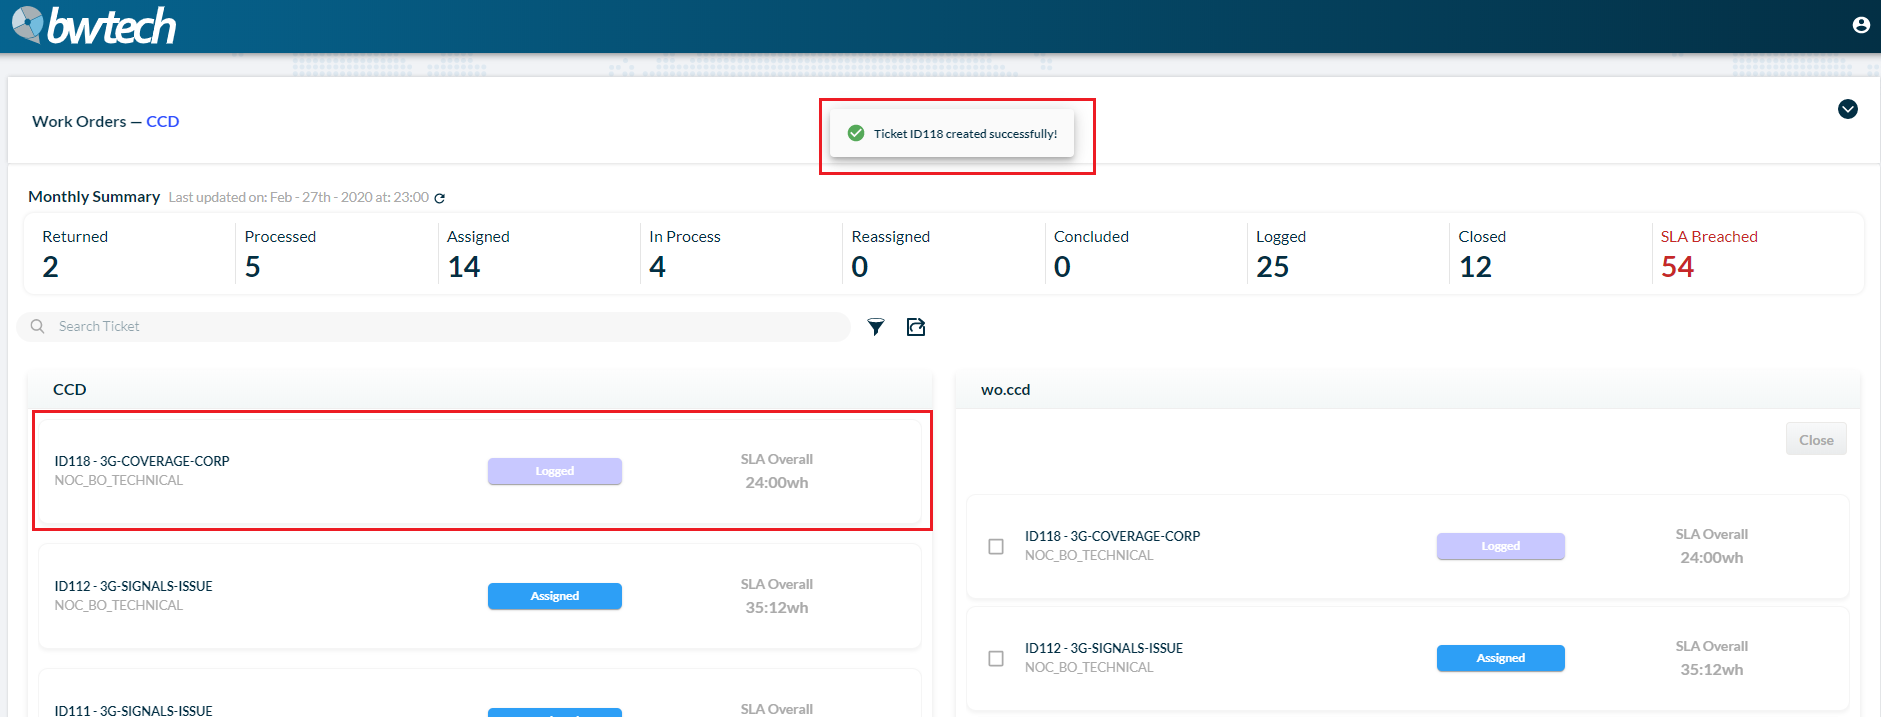
NOTE: All the tickets created by the CCD team stay visible in their panel until it is closed. This happens so that the team can know and follow each ticket, discovering their status and knowing with whom and where each one is.
Returning a ticket
After the NOC or SLM team worked on the ticket, they will return it to the CCD panel. It is the CCD team’s job to analyze what was made and see if the problem was solved. If not, it can be returned to the NOC team to continue working on it. But pay attention! It can only happen when it is an NW ticket that has Processed status.
1 – On the menu, click on the CCD option.
2 – Now, choose the ticket you want to work with.
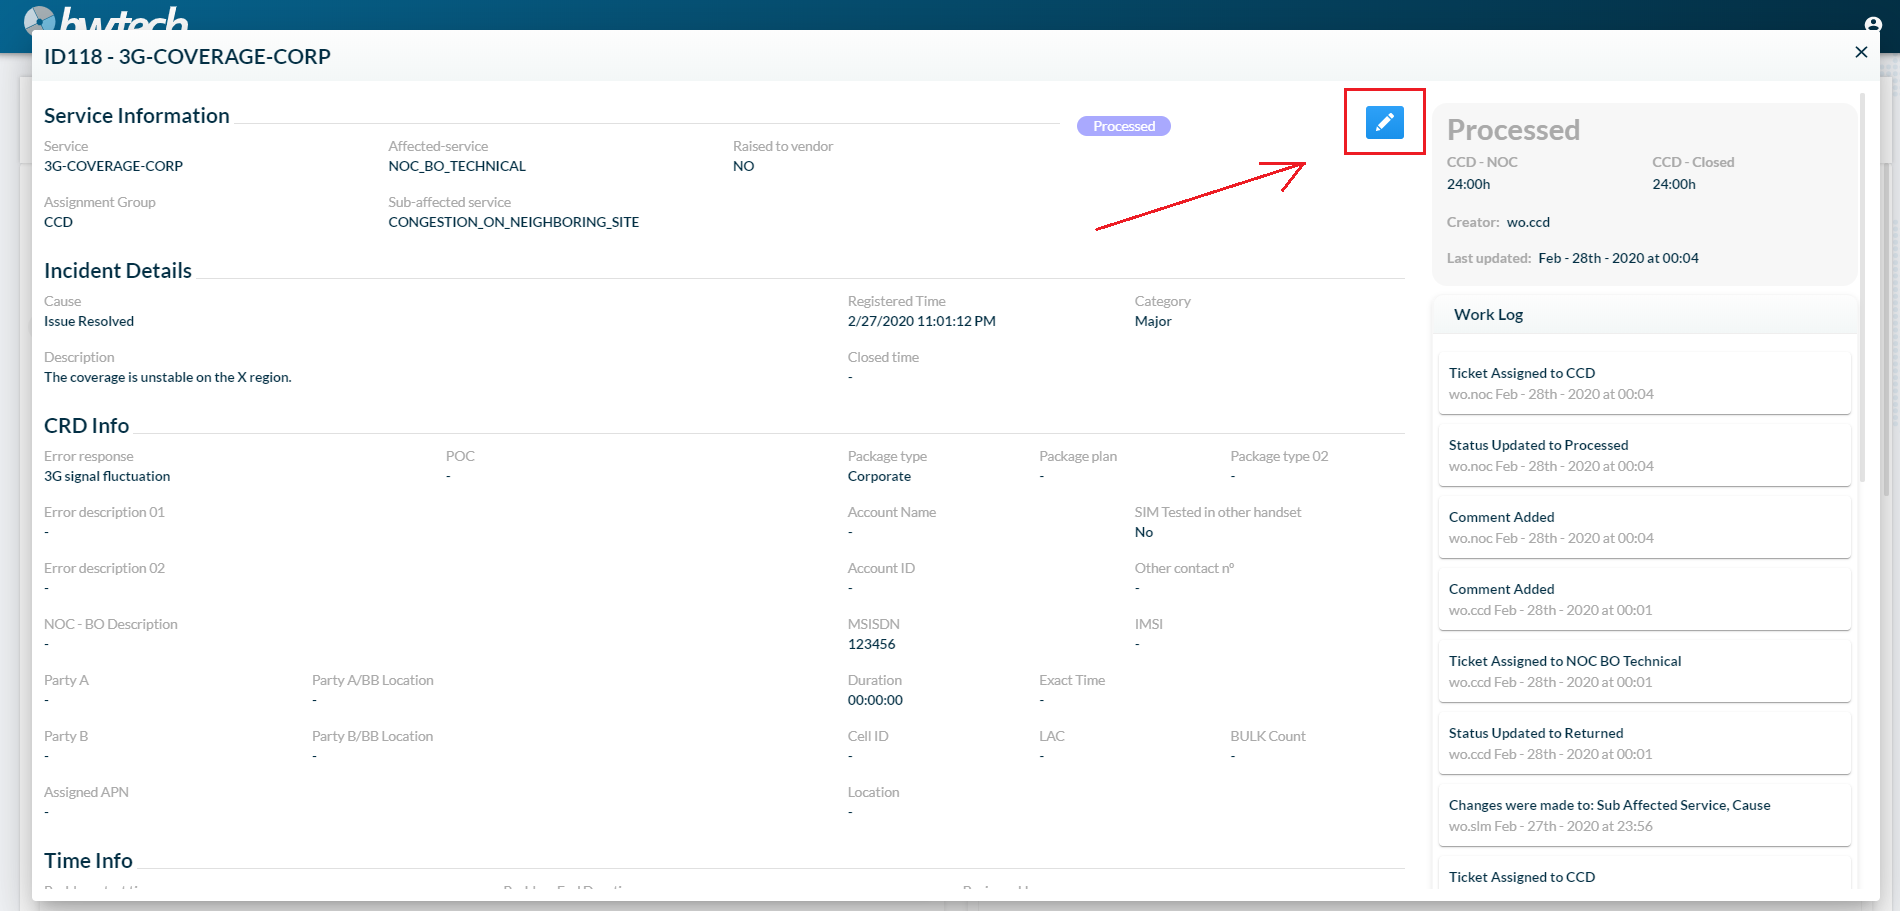
3 – In the ticket window, you can see the work log and the details added by the assigned group.
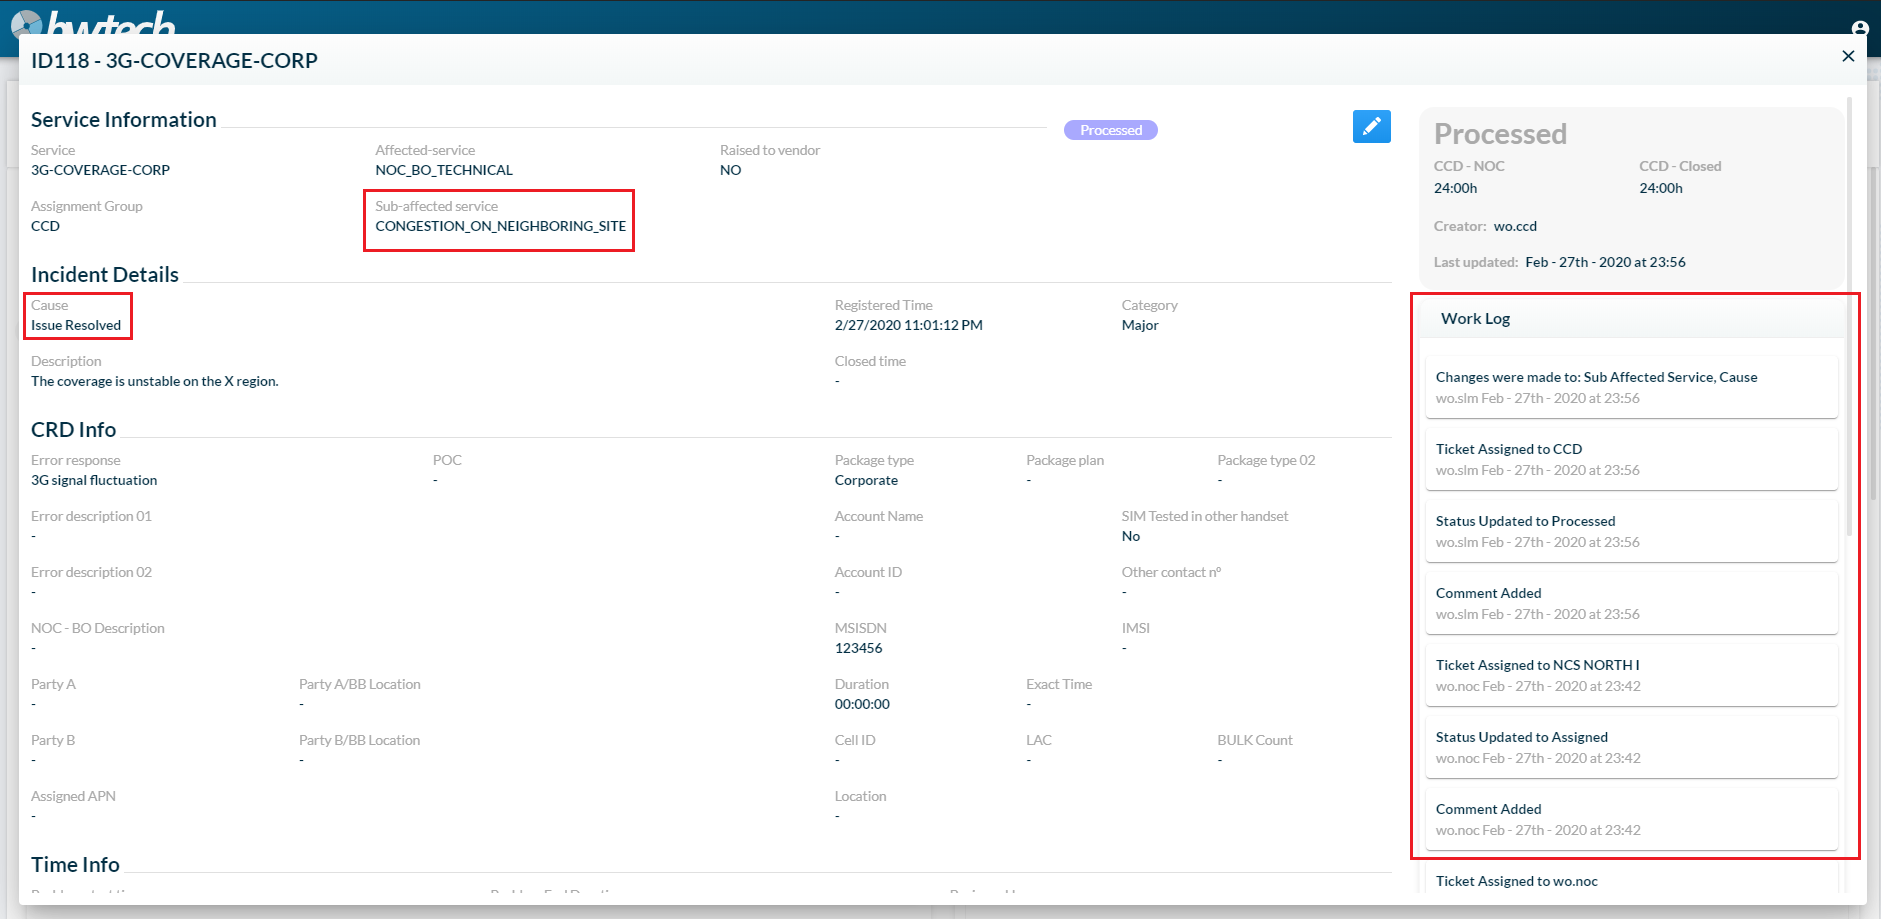
4 – To edit it, click on the Edit button.
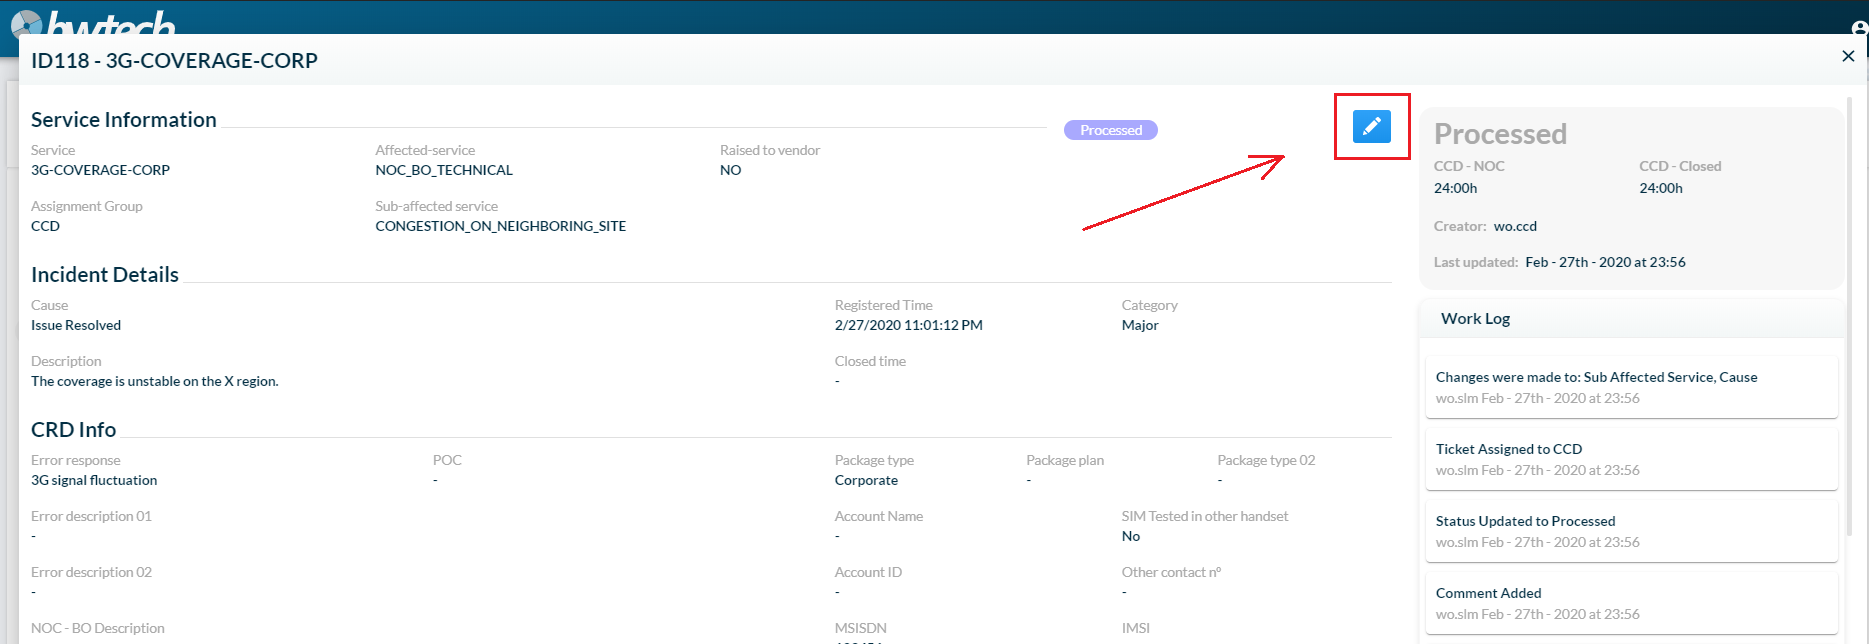
5 – Now, you can change the ticket status.
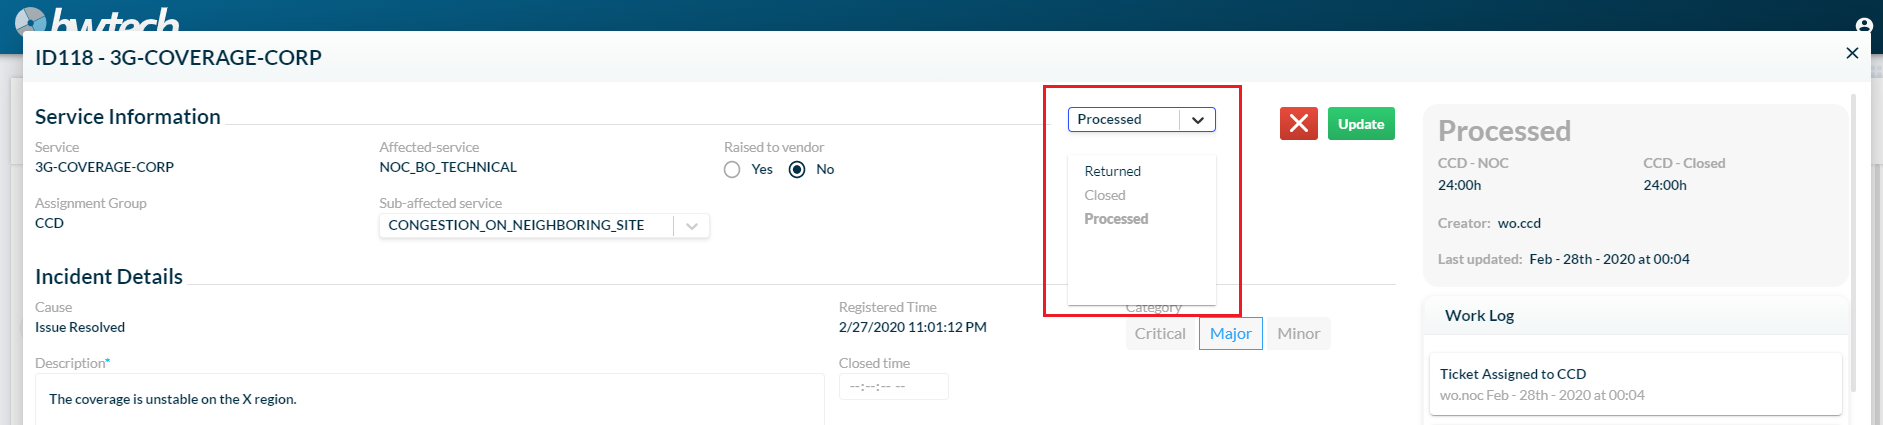
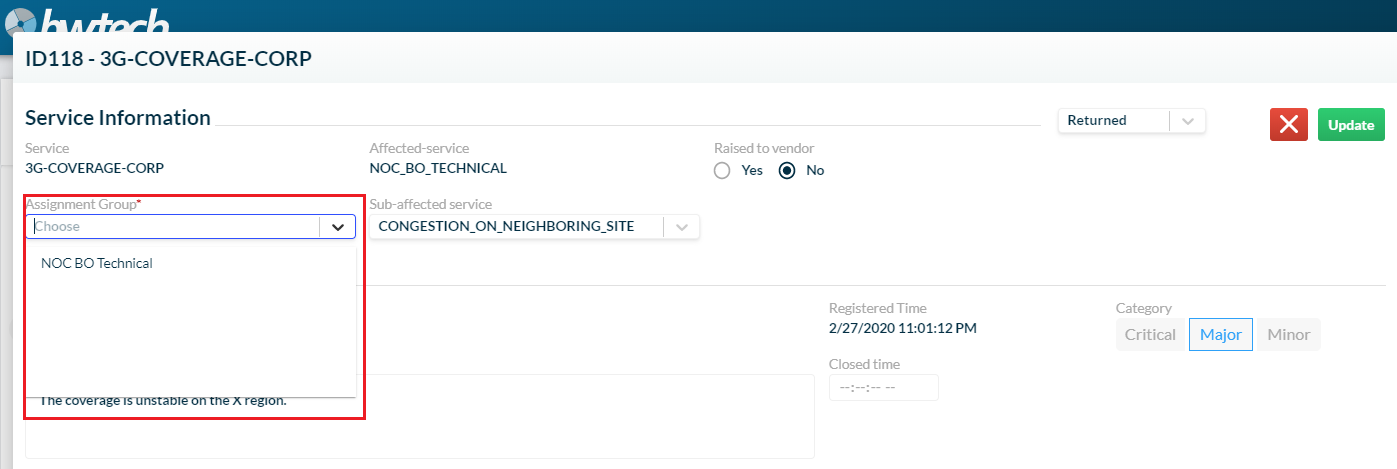
6 – Choose the Assignment Group that will receive the returned ticket.
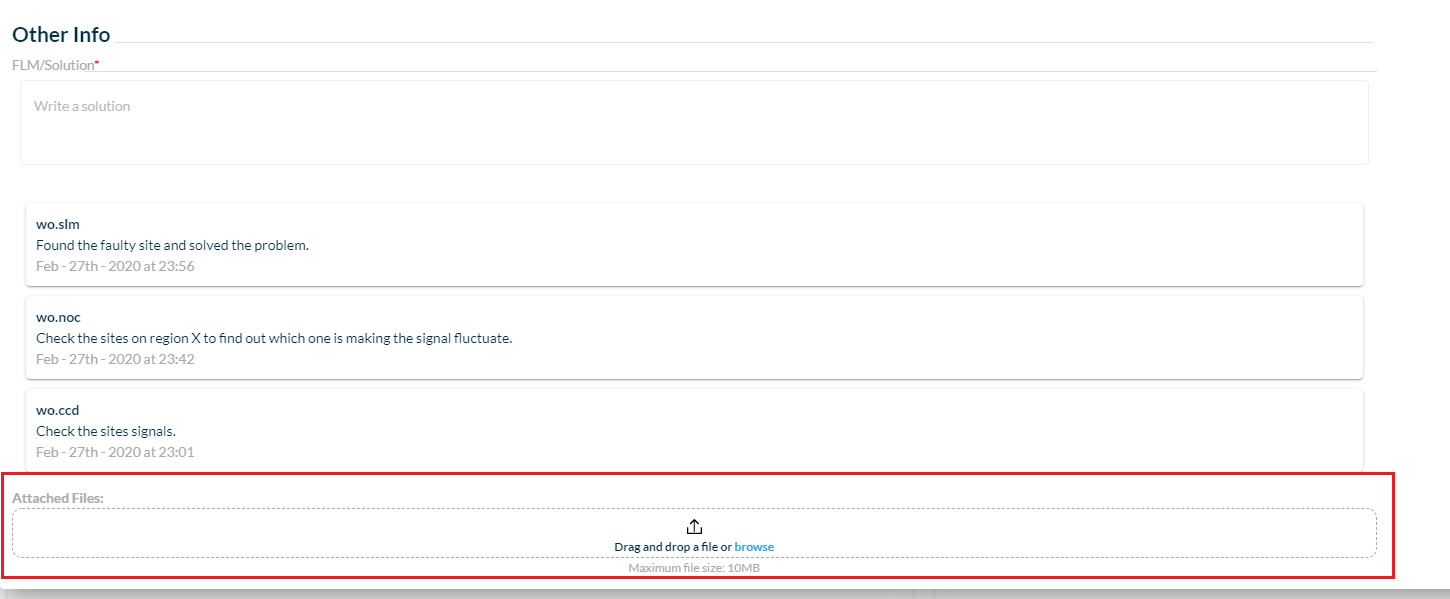
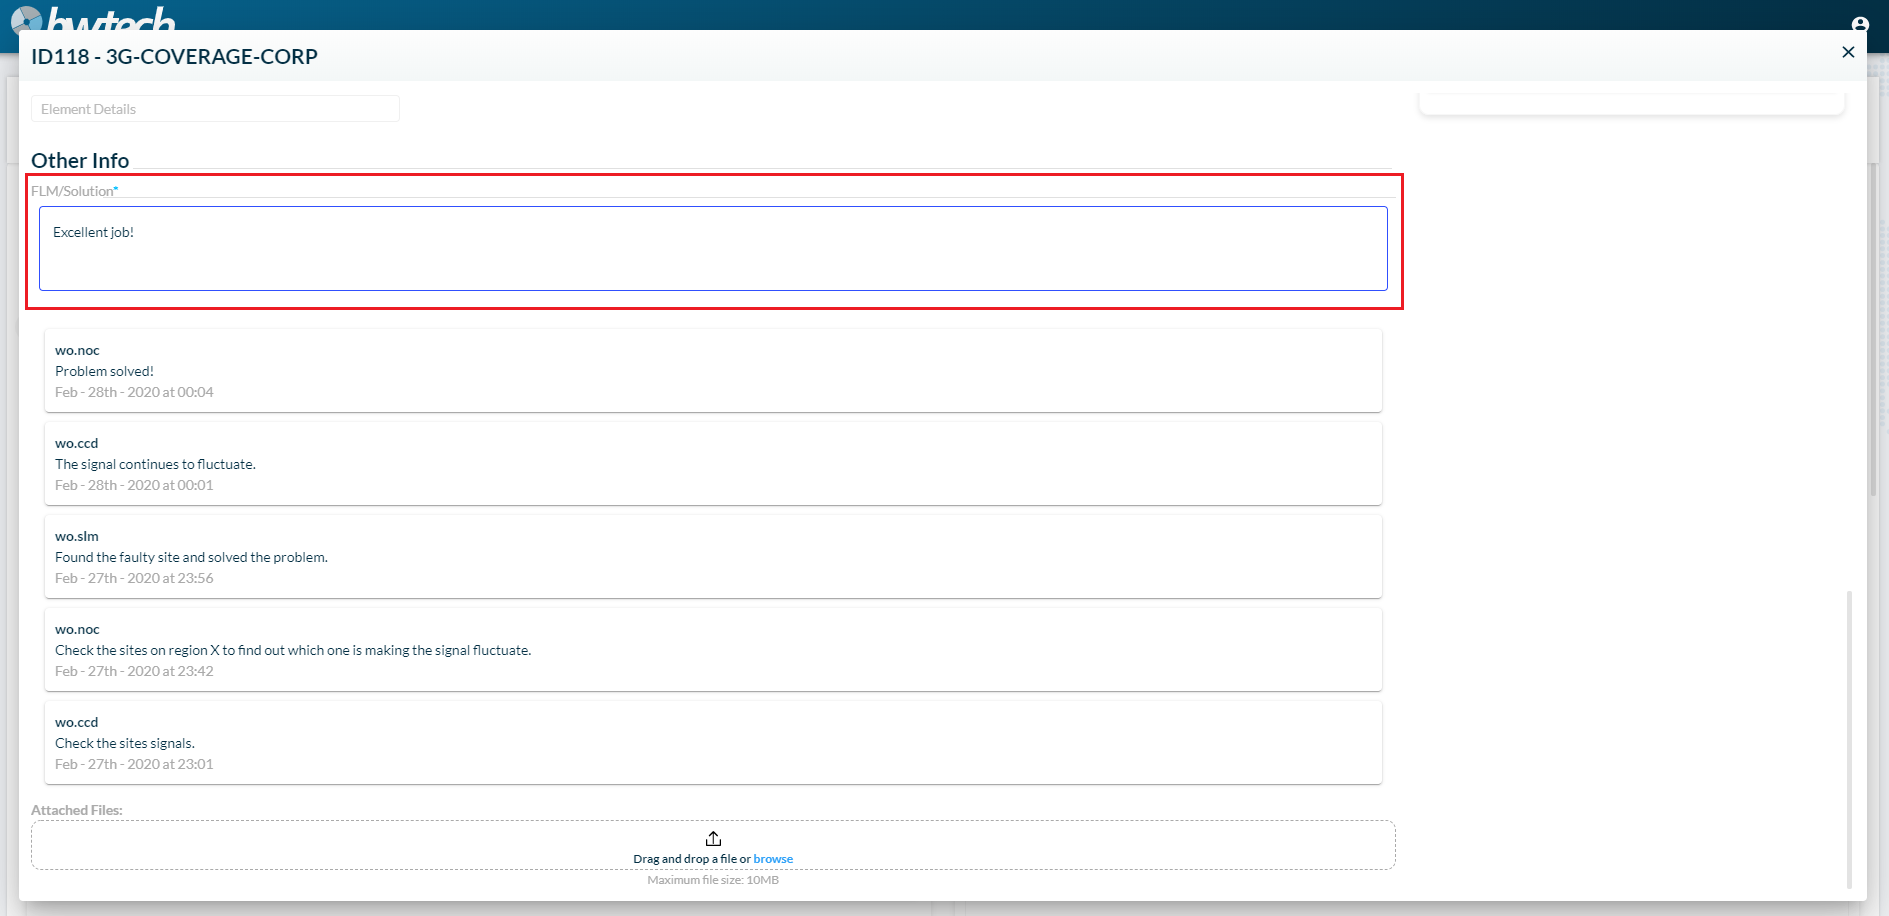
7 – Add new comments on the FLM/Solution box.

8 – You can also attach files.
9 – After filling all the needed information, click on the Update button.

10 – But if you want to cancel the changes made, just click on the X button.

11 – And, that’s it! The ticket is now returned so that the assigned group can continue to work on it and solve the problem.
Resolving a ticket
There is three ticket status that the CCD team can pick and resolve it: processed, concluded or closed. It is important to know that, before resolving a ticket and finalizing it, the CCD team needs to analyze what was made and make sure that the problem was solved.
1 – On the menu, click on the CCD option.

2 – Now, choose the ticket you want to work with.
3 – In the ticket window, you can see the work log and the details added by the assigned group.

4 – To edit it, click on the Edit button.
5 – Now, you can change the ticket status.

6 – Add the FLM/Solution.
7 – After filling out all the needed information, click on the Update button.

Or to cancel the changes made, click on the X button.

8 – And now the ticket is closed!
COMMON ERRORS
- Trying to attach a file that exceeds the 10MB limit.