MANAGE MENU
HOW TO USE
Visibility
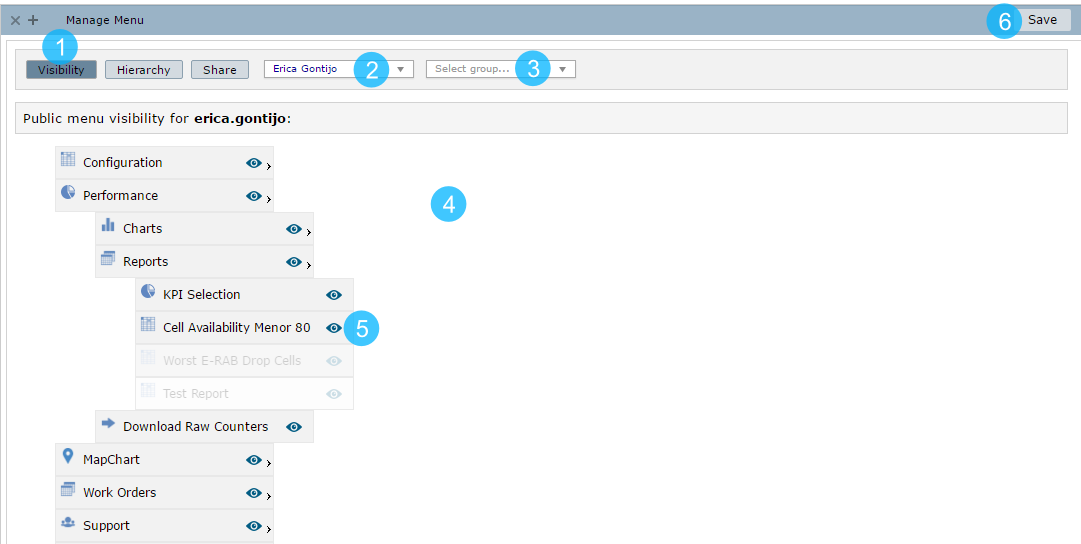
1 – Click to display the Visibility options.
2 – Select the person that you desire to manage the menu visibility.
NOTE: Only manager users can access this menu from every user.
3 – Or select a group.
NOTE: Only manager users can access this menu from every user.
4 – The available menu to the selected person or group.
5 – Click on the eye icon to hide/show a menu.
6 – Click to Save the changes.
Hierarchy
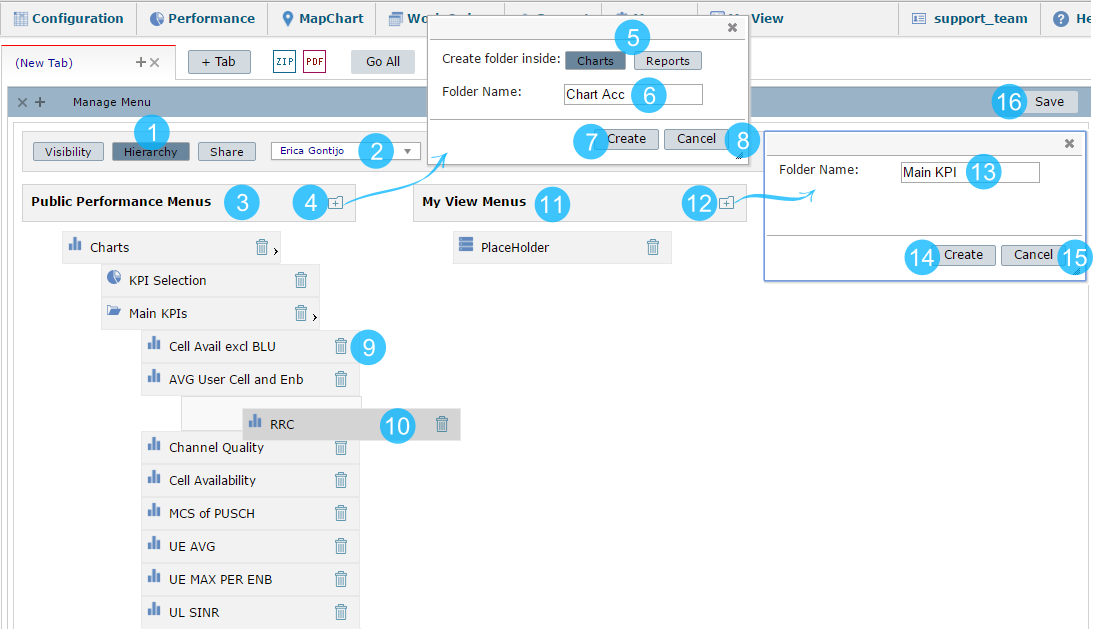
1 – Click to define the menu hierarchies.
2 – Select the person to organize his menu.
NOTE: Only manager users can access this menu from every user.
3 – The available Public Menus.
4 – Click in the folder icon to create a new public folder.
5 – Choose if the folder will be inside the Charts or Reports menu.
6 – Give a folder name.
7 – Click to Create the folder.
8 – Or Cancel the changes made.
9 – Click to delete some menu.
10 – Organize the menus, dragging them to the right position.
11 – The available Private Menus.
12 – Click in the folder icon to create a new folder inside the User Menu.
13 – Give a folder name.
14– Click to Create the folder.
15 – Or Cancel the changes made.
16 – Click to Save the changes.
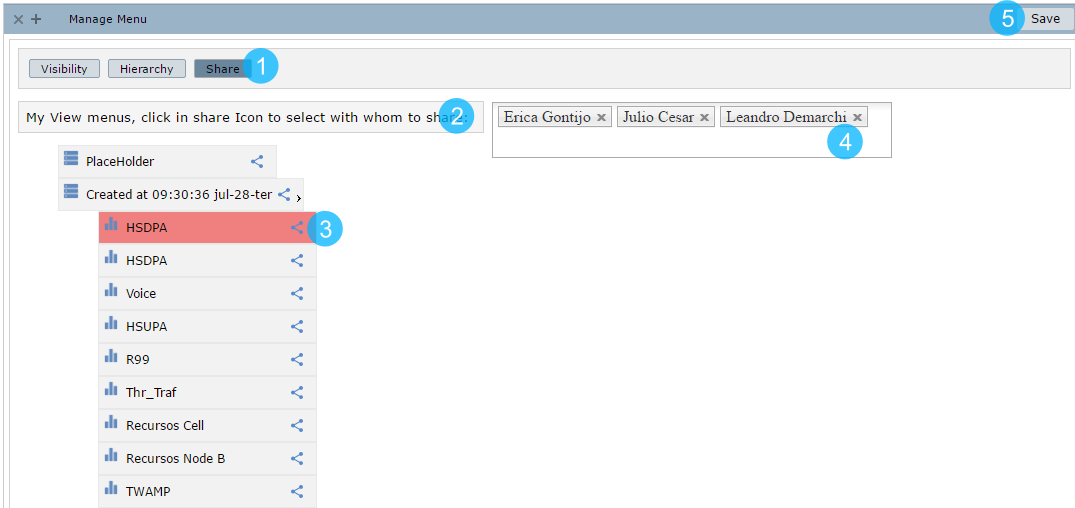
1 – Click to Share private menus.
2 – My available menus.
3 – Click in the share icon to share only that specific menu.
4 – Select with whom you want to share menus.
5 – Click to Save the changes.