First access
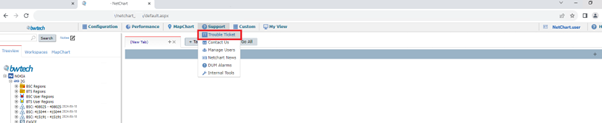
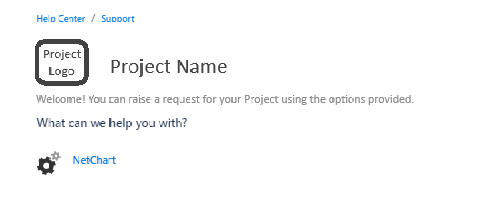
1 – Access to the portal via NetChart Page. Click on Support-> Trouble Ticket.
You will be redirected to the Jira Customer Portal for the project.
 \
\
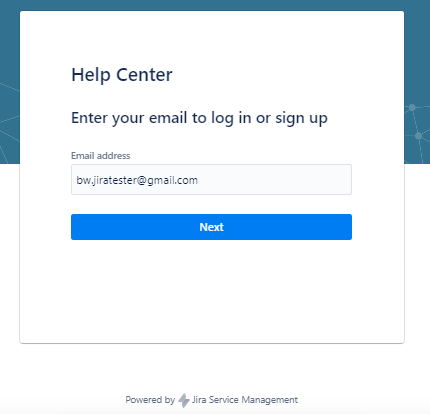
Now, you must enter your NetChart registration email and then click on the “Next” button:
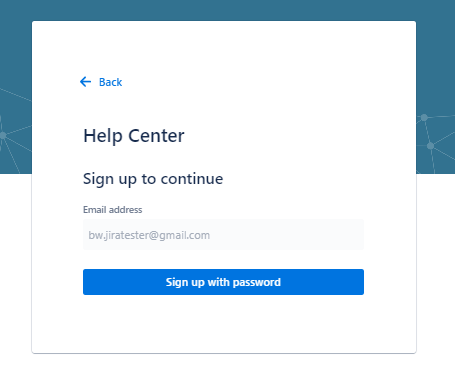
2 – Then, click on the “Sign up with password” button:
3 – A message will be displayed, requesting that the email be verified to complete the registration of credentials:
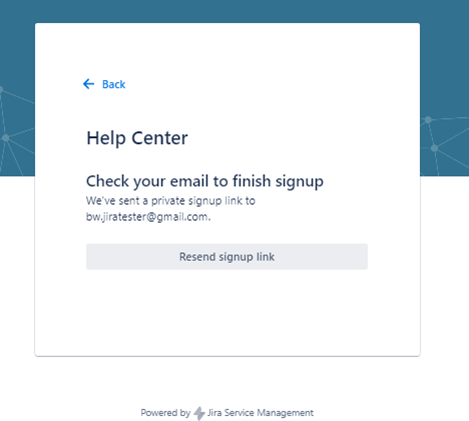
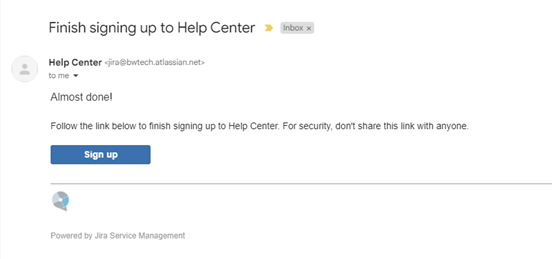
4 – An email will be sent containing a link to complete the registration of credentials on the Jira page:

5 – When accessing the link sent by email, a page will open for filling in the name and creating the password. We recommend using the same name registered in NetChart (the password may be different, at the user’s discretion): 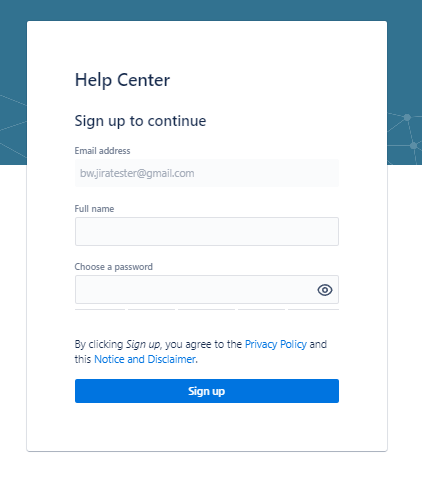
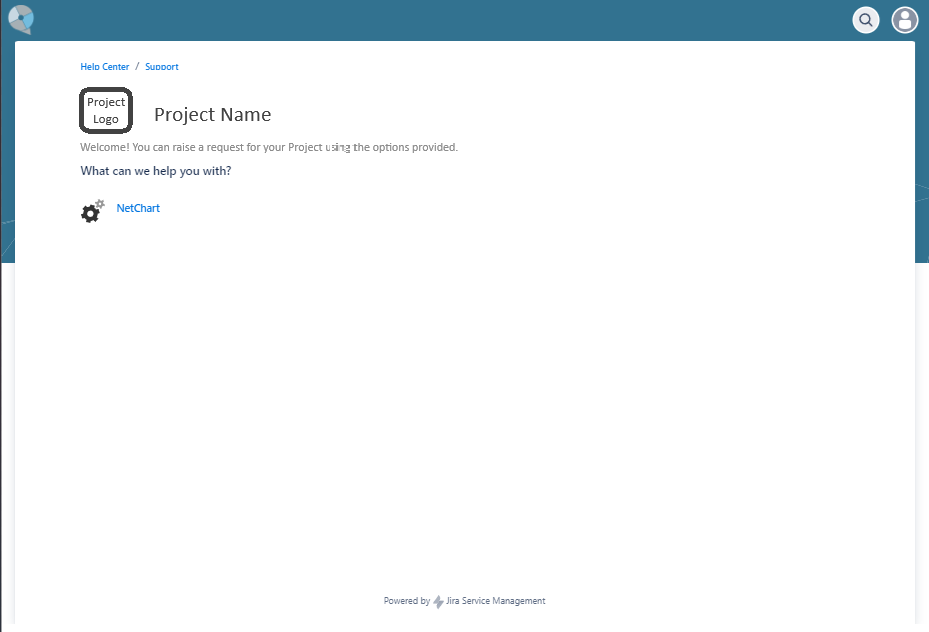
After filling in the name and password, the user will have access to the portal to create Tickets:
Accessing the form and creating tickets
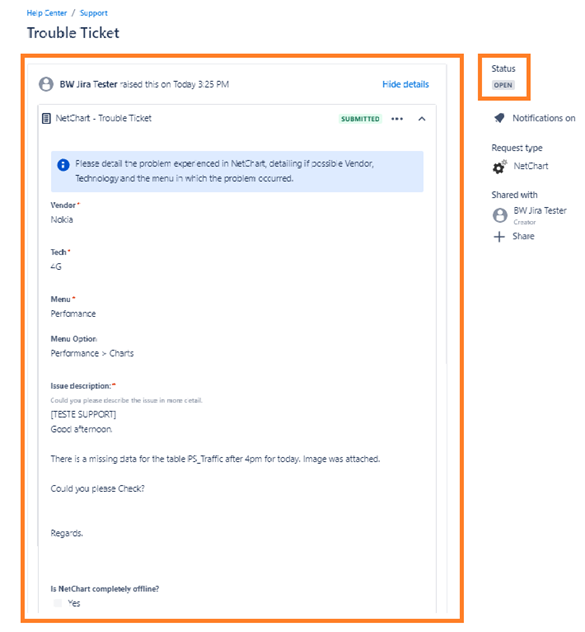
When clicking on the NetChart icon, the ticket opening form appears for the user to fill out:
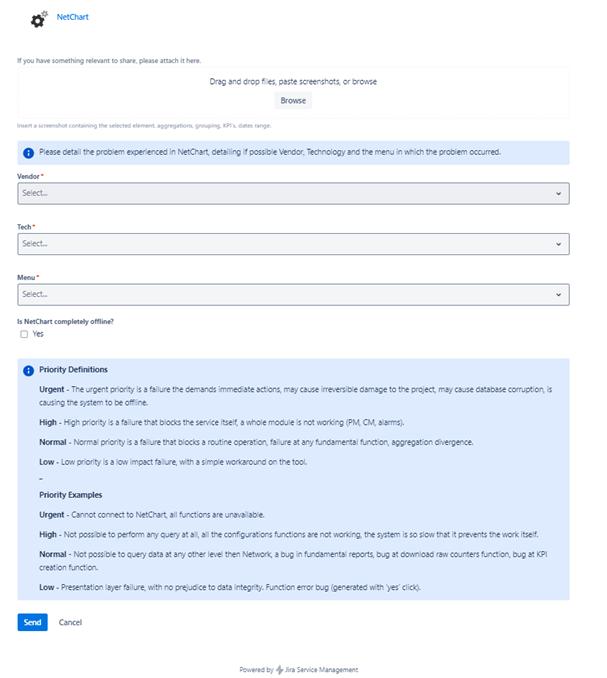
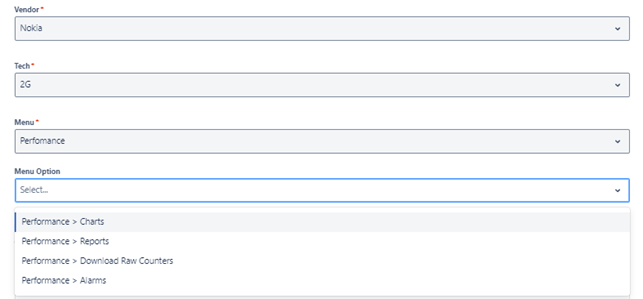
Since it is personalized, the form adapts to the user’s inputs, for example, when selecting the “Performance” menu, the Menu options that appear are exactly those available in NetChart. Fields with * are mandatory and there’s no possibility of choosing more than one Vendor and Tech, as different tickets should be created for more than one technology/vendor.
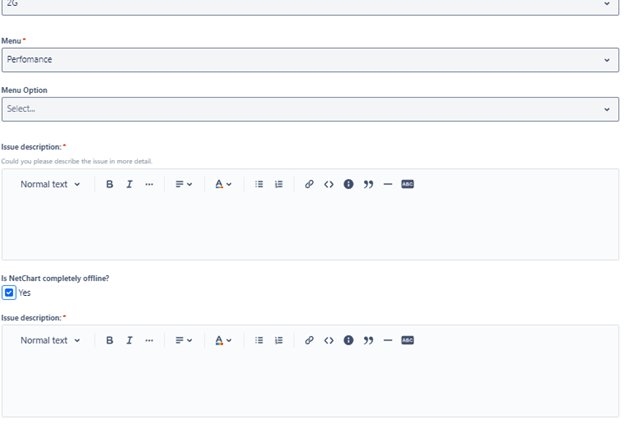
There is also the functionality of opening a ticket informing that NetChart is offline by clicking on the “Yes” checkbox below the question “Is NetChart completely offline?”.
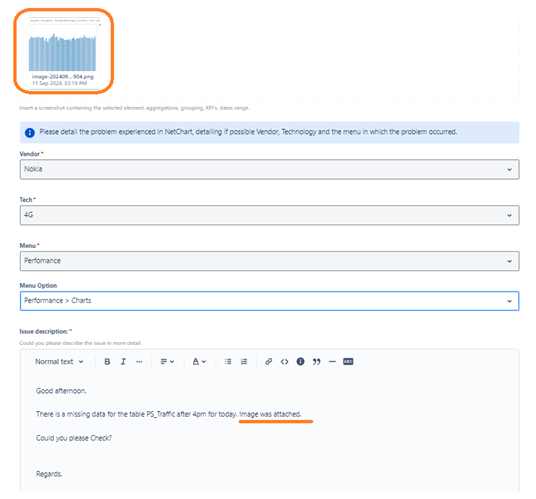
Recreating an example in Jira, it would look like the image below. Since the image attached to the ticket is not inserted into the body of the text, we suggest that the attached image be referenced throughout the text.
Example: In ticket, the image would be referenced instead of inserted into the body of the text, see image below.
Text model: “We are facing a lack of data in technology X, see attached image1.jpg. When trying to execute a KPI, the error (image2.jpg) is generated”.
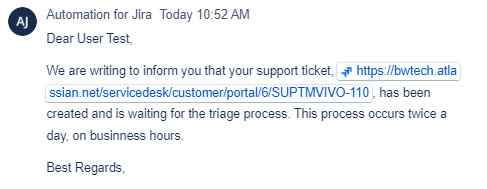
When clicking the “Send” button, the ticket is created and can be seen with an Open status. Each change in status/support contact with this ticket is received via email, however, we recommend that interactions in ticket responses be done using the portal. Even though it is possible to interact in a ticket by replying via email, formatting issues may occur that hinder understanding. In addition, tickets opening can only be done via the portal, it is not possible to open a ticket sending an email.
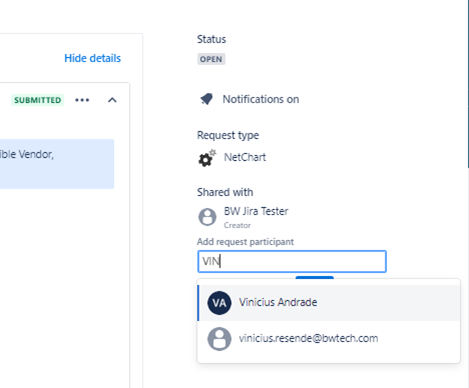
You can share the ticket you created with another user who already has an account on the portal:
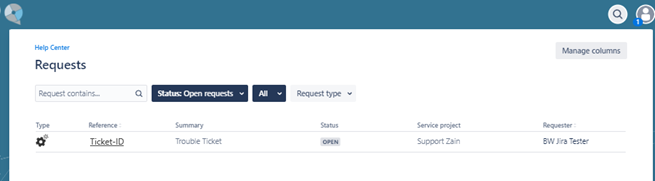
After opening the ticket, you can track the tickets created/shared with your user by accessing the requests button:
To return to the ticket creation form, simply click on a link in the Service Project field. You can also access the unique URL of each Ticket to track it; for example, for the ticket created in this tutorial, a link was generated which can be found by clicking on the Ticket ID.

Interactions in tickets between users and the Support Team
The status of the tickets, their descriptions and existing interactions are:
Open – Ticket was generated and is awaiting triage process.
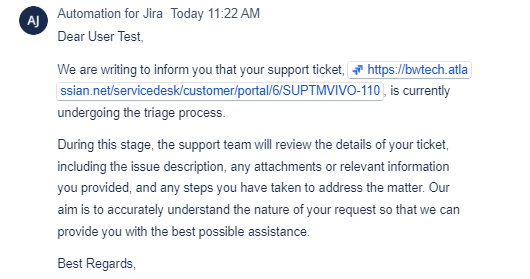
In Triage Process – Ticket is in the triage process to define priority and category.
Support Team Backlog – Ticket allocated to the team backlog, awaiting troubleshooting by an agent.

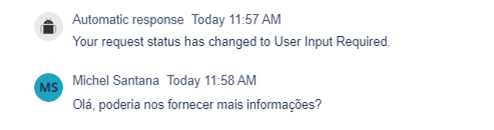
User Input Required – Ticket requires more information for troubleshooting to be performed. If there is no contact from the customer, the ticket automatically goes to Resolved status after 5 days. If there is interaction from the user, any comment added to the ticket will return it to Work in Progress status.
Work in Progress – An agent has initiated troubleshooting.
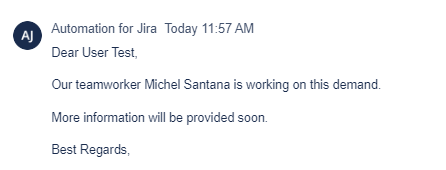
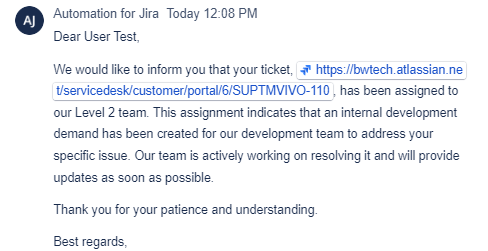
Assigned to Level 2 – A request had to be created for a development team to evaluate the issue.
Internal Validation – The development team’s request has been resolved and a Support agent is validating the solution.
![]()
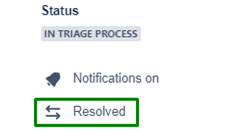
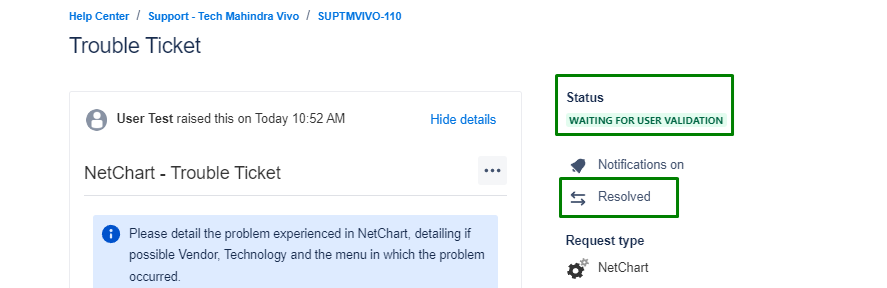
Waiting for user validation – The issue has been resolved and is awaiting validation from the user. If there is no contact from the customer, the ticket automatically goes to Resolved status after 7 days.
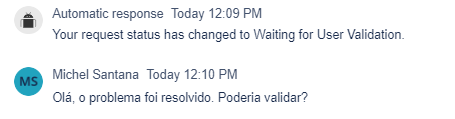
If the issue is validated and considered resolved by the user, simply click the Resolved button next to the ticket status to close the ticket. If not, any comment added to the ticket will return it to Work in Progress status.
Resolved – The ticket topic has been resolved and interactions are no longer possible.

The user can apply the Resolved status to a ticket at any time if the ticket has a status other than Open.