Contents
MULTIPLE CHECK
OVERVIEW
This function is designed to identify network elements whose parameters do not adhere to user-defined rules, and subsequently correct them by applying alternative rules. It is similar to Simple Check but offers the flexibility to use multiple parameter tables in the rule set. Additionally, it generates a script to modify the parameters in the OSS (Operations Support System).
The Multiple Check empowers users to define complex rules using arithmetic and Boolean operators to filter elements effectively.
How to use
Log in to your NetChart account.

Access the Multiple Check feature
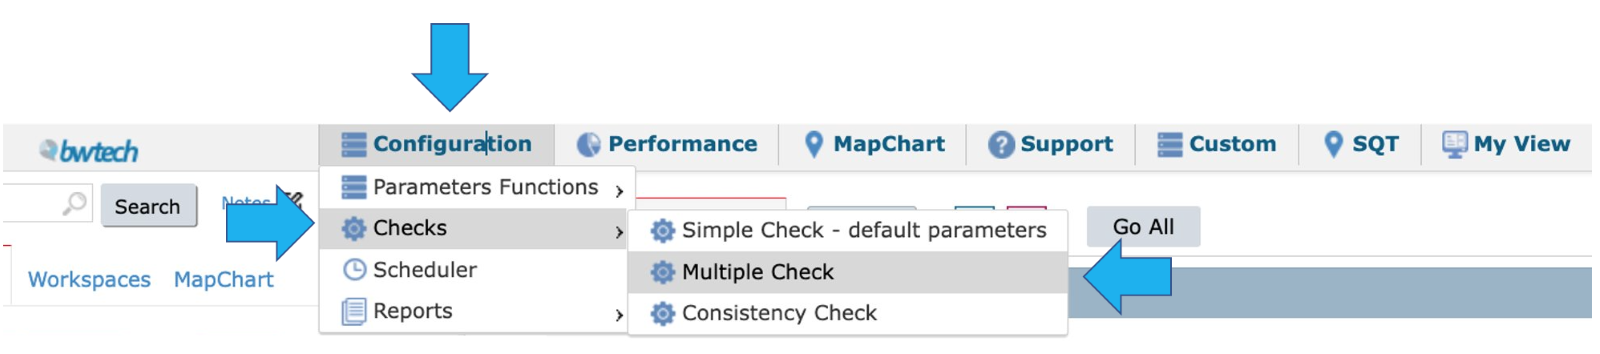
To start, select the element(s) to be analyzed from the treeview.

Next, select Configuration > Checks > Multiple Check.
Functions description

1 – Choose to add baseline rules in the NetChart interface.
2 – Choose to import a baseline file.
3 – Download the default template file (simple or complex format) and open it in a spreadsheet editor.

4 – Click on Options > Date to select the date to run the check and select OK.

5 – Click on Options again to:
6 – Select the Last Available Data function. It considers only the last day of available data to be analyzed. When this option is enabled, it ignores the calendar range and considers the previous 15 days.
7 – View only the parameters in which the percentage of inconsistencies is greater than the value defined in this field.
8 – Define the number of rows that will be displayed in the data table by page.
9 – Select results to be returned by aggregation levels.
10 – Choose to correct the parameters by generating the scripts automatically.
11 – Click on OK to save the configured baselines’ preferences.
12 – Select GO to run the checks.
Build the rules
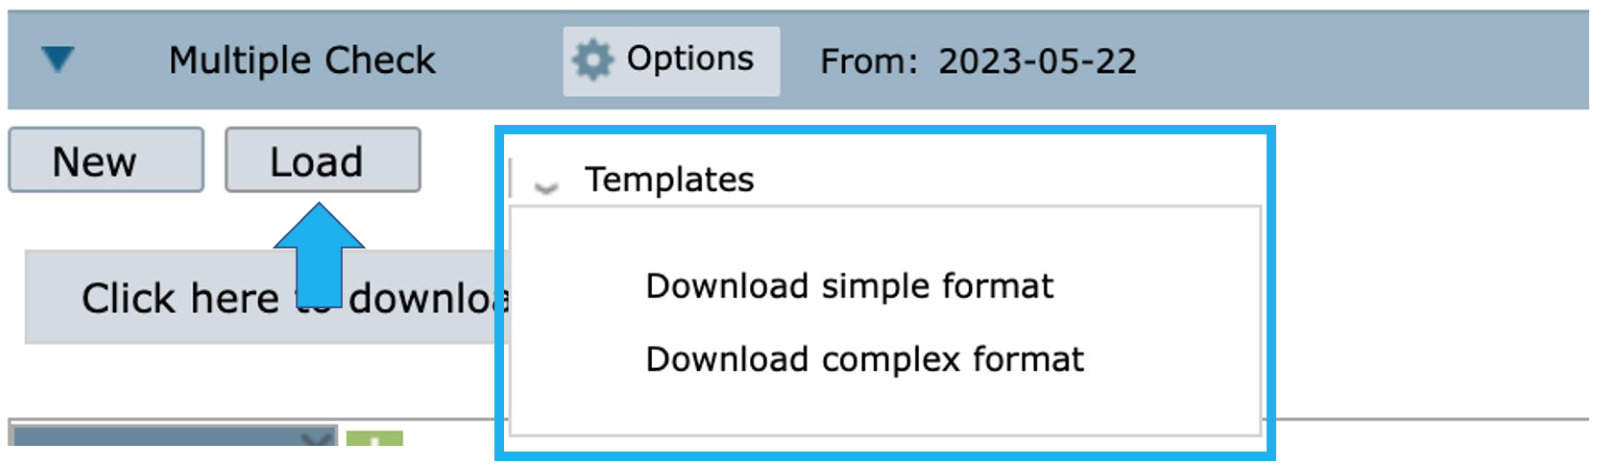
Select New to create the rules directly in the interface or select Load to import a template file.

1 – Select New to open the Parameters Selection window.
2 – In the Parameters Selection window, view all the available tables for the selected element in the treeview. Choose the table(s) that will be included in the baseline.
3 – Select the parameters from each table, then drag and drop them in the Parameters field.
4 – View the selected parameters from different tables. Observe that the parameters are displayed in this field with its table. E.g.: for activeotherlms.dateday, the table is activeotherlms and the parameter is dateday.
5 – Select OK to save the chosen parameters or Clear to define new parameters.
6 – Select GO to run the check.
Setting the values

1 – View that the parameters come separated by tables in each tab.
2 – By default, the parameter values are set to 0. To modify them according to your desired rule, click on the field, edit the value, and enter the intended value for the rule. If you wish to check for NULL values, leave the field empty.
NOTE: If the newly configured rule involves a character value (e.g., NULL, FALSE, NO), it is necessary to enclose the word in quotation marks. For example: activeotherlms.dateday <> ‘FALSE’.
However, for numerical values, quotation marks are not required.
3 – Enter the desired value that the parameter must have. Once the check is executed, a script can be generated. You can use this script to update the parameter in the OSS, setting it to the value entered in the Values to Set field.
4 – Use this button to download the template file generated by the tool. This option is useful in case you need to change some parameters.

5 – The results are usually displayed in different tabs. By default, there are 3 permanent tabs:
- Ignored: it considers the failed results.
- Parameters Summary: it considers the configured parameters and returns a table containing the percentage between the filtered elements and the total number of elements.
- Summary: it considers the defined rule, which elements respect this rule and calculates a percentage of it.
6 – This table shows the elements result related to the defined table, such as PARAMETERNAME, CURRENT VALUE, TEMPLATE VALUE, APPLIED FILTER RULE, FILTER RULE VALUES, etc.
7 – Use this button to download the check results file generated by the tool.
8 – In case there are too many rows, use the Search field to search for a specific result.

9 – In case there are too many rows, use the Search field to search for a specific parameter.
10 – Click here to load the last used tables.
11 – Click on GO to check the defined rules.
12 – Manually generate the scripts related to the configured check that will modify the necessary rules.
Use the Generate Script Automatically function to automate the generation of scripts that correct the parameters.
Select Options > Generate Script Automatically > OK > Click here to download the script file.

Use this option to load your own templates, created by the NetChart templates (simple or complex) available.
Choose one of the two available formats to download the TXT file and export it into a spreadsheet. This option is particularly useful when there is a need to modify multiple parameters across different tables, as it simplifies the process of making a substantial number of rule modifications.
Simple format template
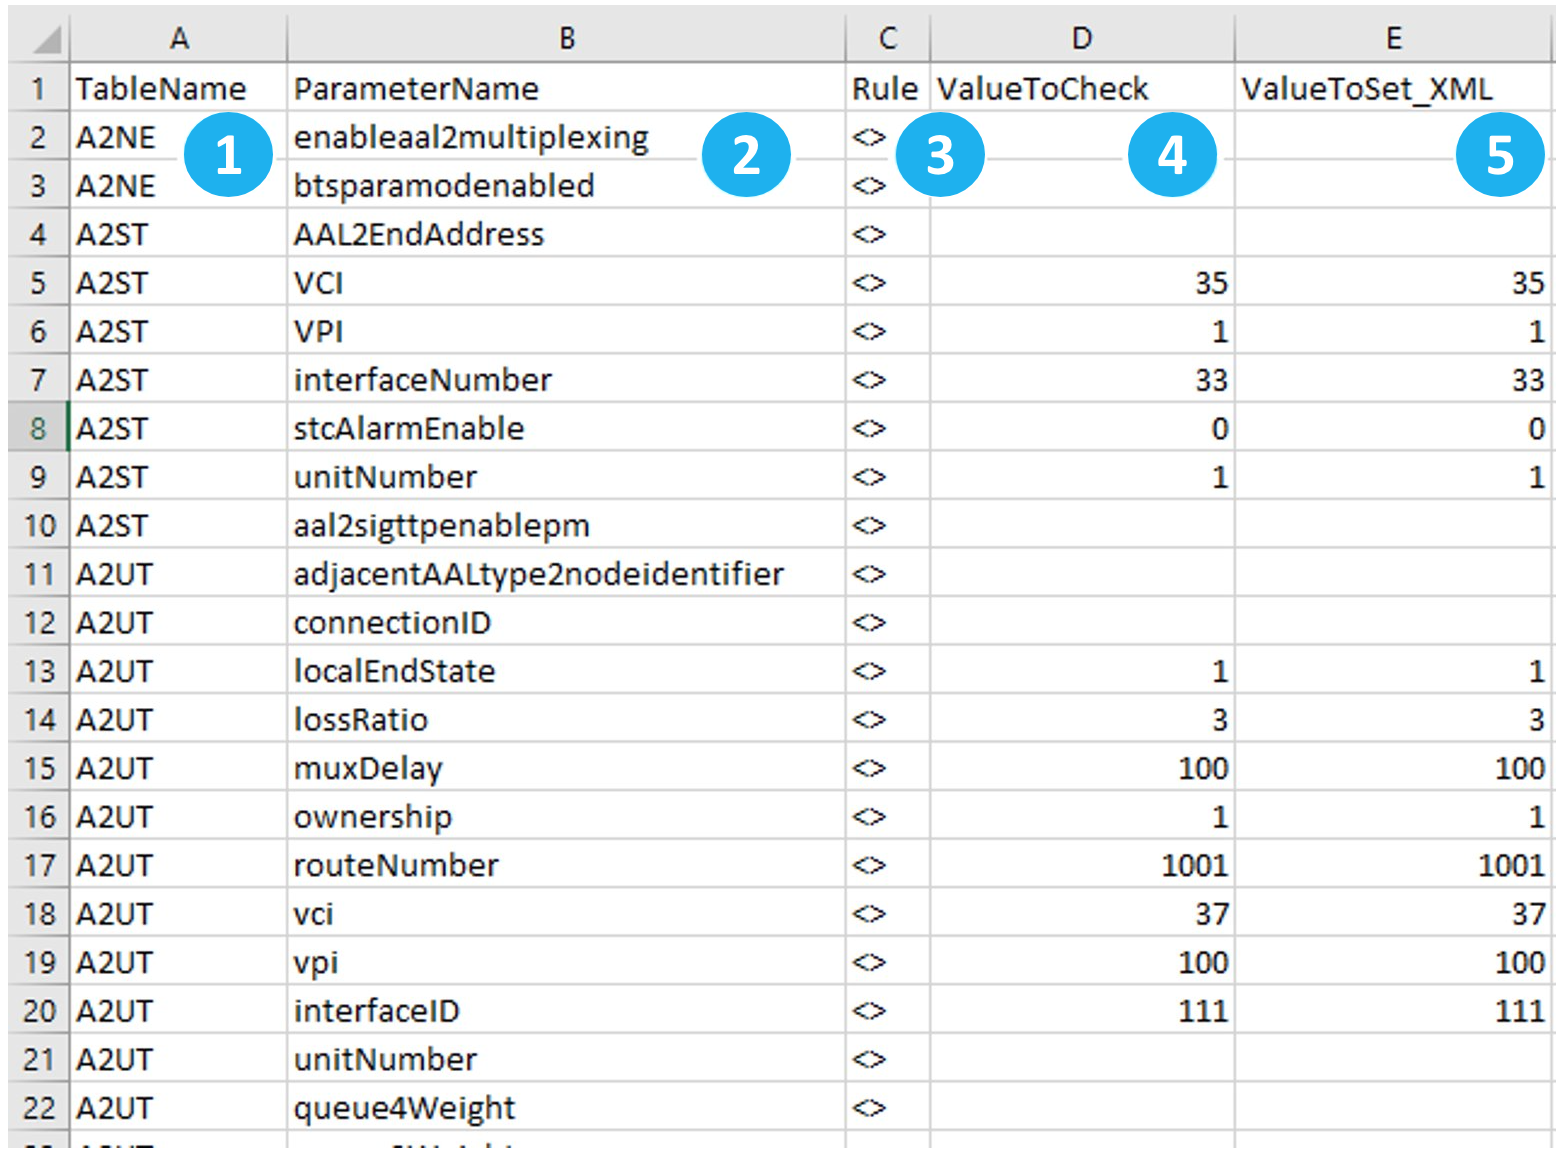
1 – TableName: This column displays the table’s name.
2 – ParameterName: This column displays the table’s parameters. It is possible to remove the lines related to the parameters that you do not want to use in the set of rules.
3 – Rule: In this column, you can change the rule type you want to use for the related parameter.
Allowed values include =, <>, >, <.
4 – ValueToCheck: In this column, you can enter the value to be used in the rule. Leave this field empty if you want to check for NULL values.
5 – ValueToSet_XML: In this column, you can enter the value that the parameter must have.
Once the check is executed, a script can be generated. You can use this script to update the parameter in the OSS, setting it to the value entered in the Values to Set field.
NOTE: If the newly configured rule involves a character value (e.g., NULL, FALSE, NO), it is necessary to enclose the word in quotation marks. For example: activeotherlms.dateday <> ‘FALSE’.
However, for numerical values, quotation marks are not required.
Complex format template

1 – RulesToCheck: This column displays the rules that will be checked. Observe the format of the rule: (e.g.: gcellidlefddba1.item).
2 – ValuesToSet: This column displays the parameter values to be set for the elements that do not comply with the filtering rule used. If left empty, the tool will return only the elements that fit the rule.
Once the check is executed, a script can be generated. You can use this script to update the parameter in the OSS, setting it to the value entered in the Values to Set field.
NOTE: If the newly configured rule involves a character value (e.g., NULL, FALSE, NO), it is necessary to enclose the word in quotation marks. For example: activeotherlms.dateday <> ‘FALSE’.
However, for numerical values, quotation marks are not required.