Exclusion Cells
OVERVIEW
The Exclusion Cells feature allows the user to remove some cells during a specific period of time from the KPIs report. Therefore, when the system gathers the information, those cells KPI values will not influence the network report at any level.
HOW TO USE
1 – First, discover the ID of the cells you want to exclude from your reports.
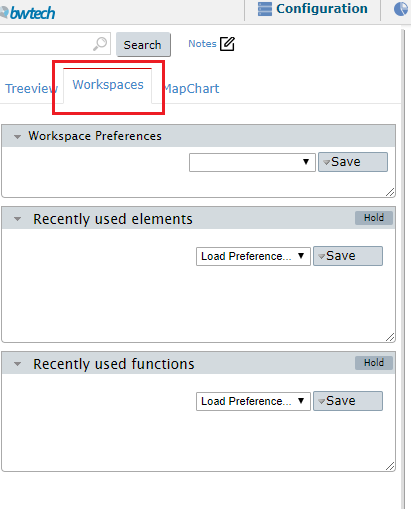
2 – After doing that, click on the workspace option (you can find it on the tabs menu just above the treeview).
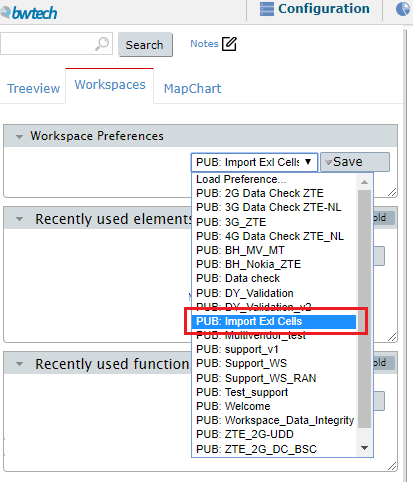
3 – Next, in the Workspace Preferences window, select the public workspace called PUB: Import Exl Cells.
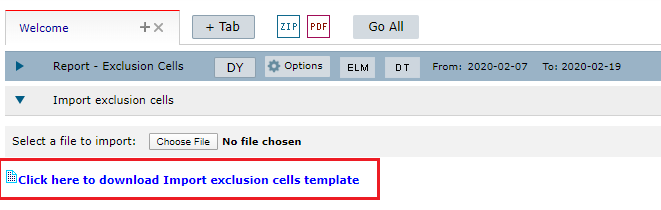
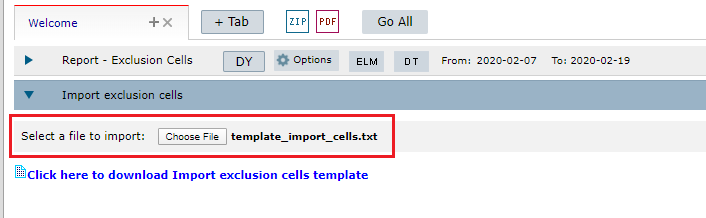
4 – Download the Exclusion Cells template.
5 – In the file, put all the information about the cells you want to exclude from the report. It is important to fill the template correctly and insert the tech, controller ID, site ID, and cell ID along with the period of time that you want to exclude them.
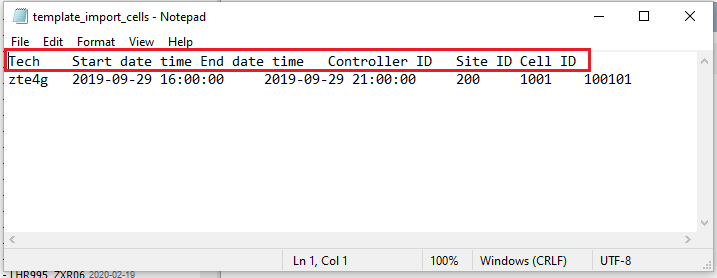
NOTE: There are different identifications for Controller ID, Site ID and Cell ID for each tech and vendor. To help you identify the information you need on the exported documents, in the table below you’ll find the right name for each data requested in Exclusion Cells the template:
| Tech/Vendor | Controller ID | Site ID | Cell ID |
| ZTE 2G | controllerid | siteid | btsid |
| ZTE 3G | RNCID | NODEBID | CELLID |
| ZTE 4G | SubNet_id | ENBFunctionFDD | EUTRANCELLFDD |
| NOKIA 2G | bscId | bcfId | btsId |
| NOKIA 3G | RNC_ID | WBTS_ID | WCEL_ID |
| NOKIA 4G | MRBTS | LNBTS | LNCEL |
6 – After filling the .txt document with the excluding cells information, import the file.
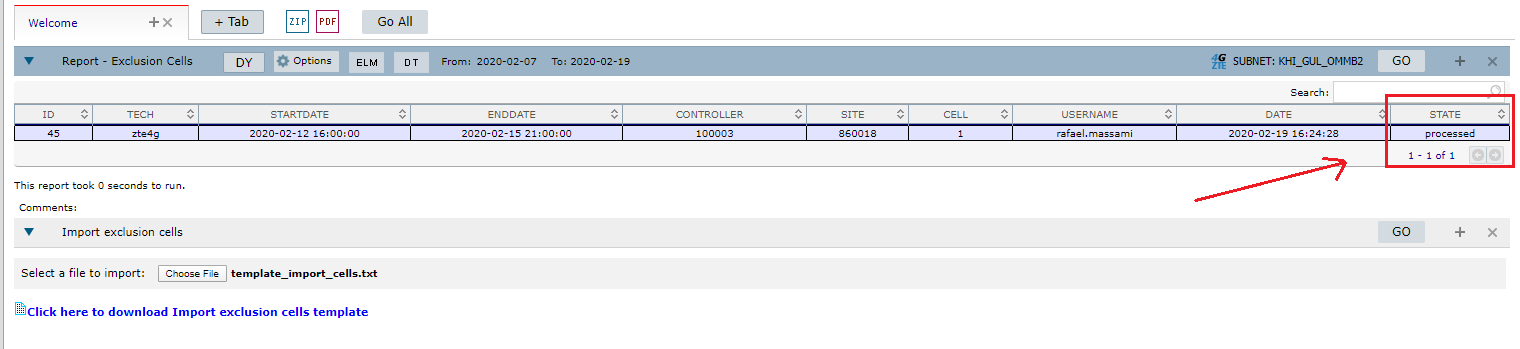
7 – Click on the Go button.

8 – After importing the file, click on the Go button in the Report – Exclusion Cells tab and NetChart will process its information during the night. There are three possible states:
- Pending – the system is waiting to process the report.
- Processing – the system is processing the report.
- Processed – the report is finalized.
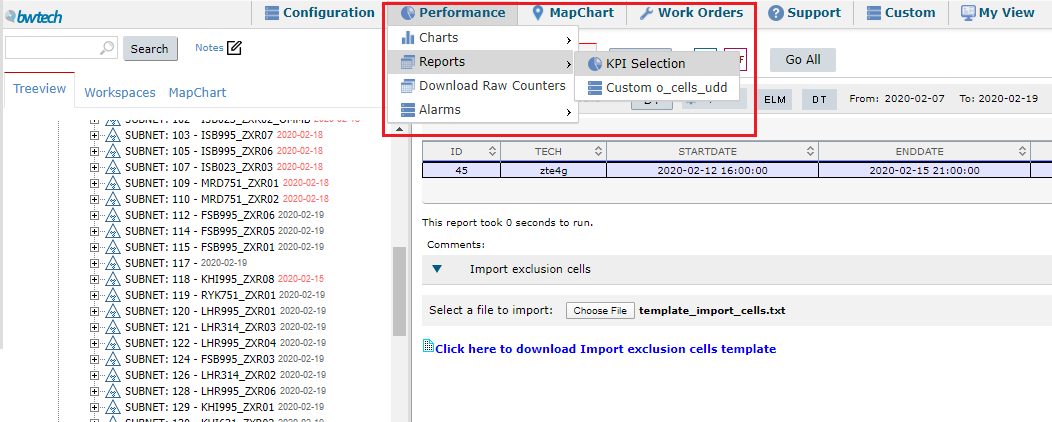
9 – After the processing is done, it is time to get the KPI report. Go to the Performance menu, select Report and click on KPI Selection.
10 – On the KPI tab, choose the option DY0024.
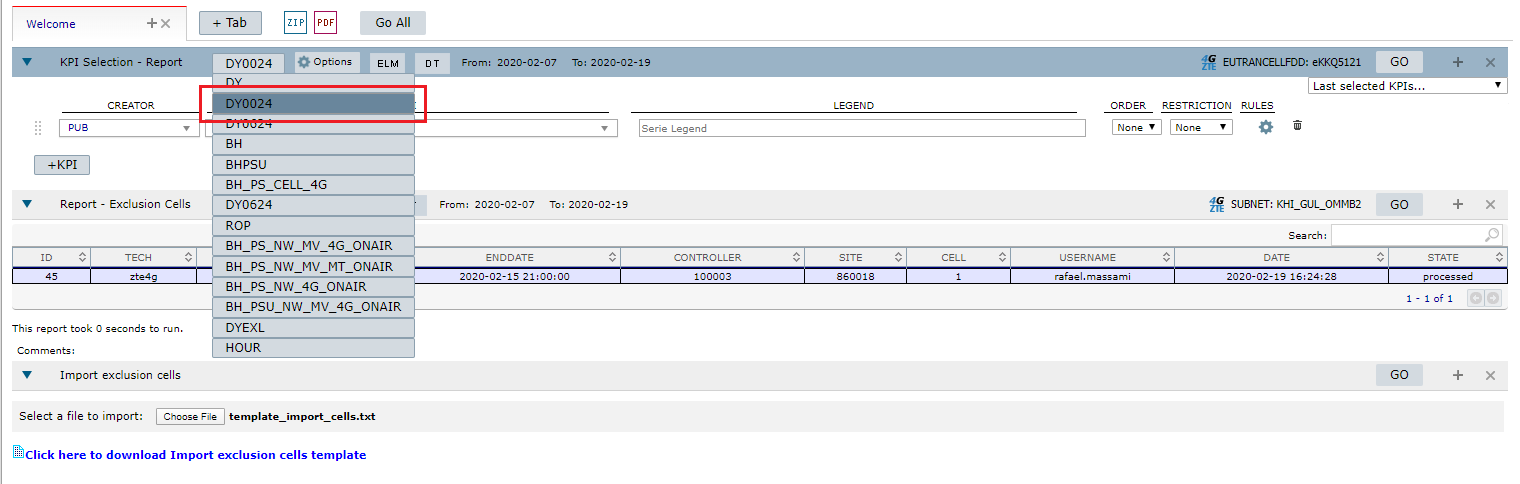
11 – Now, select the KPI you want to monitor.
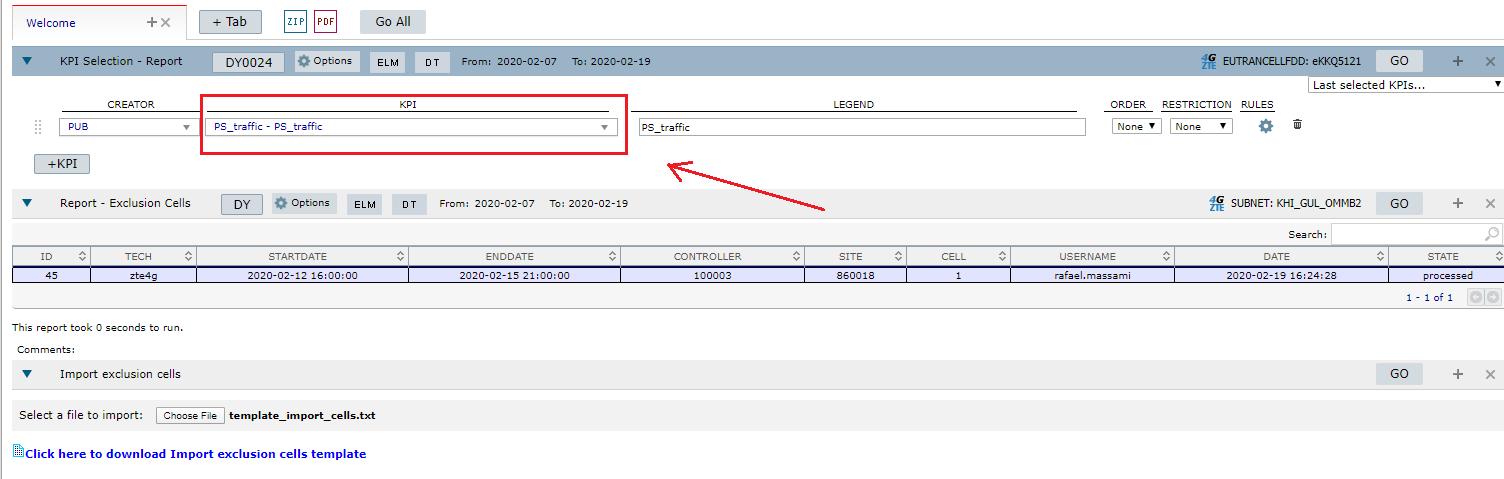
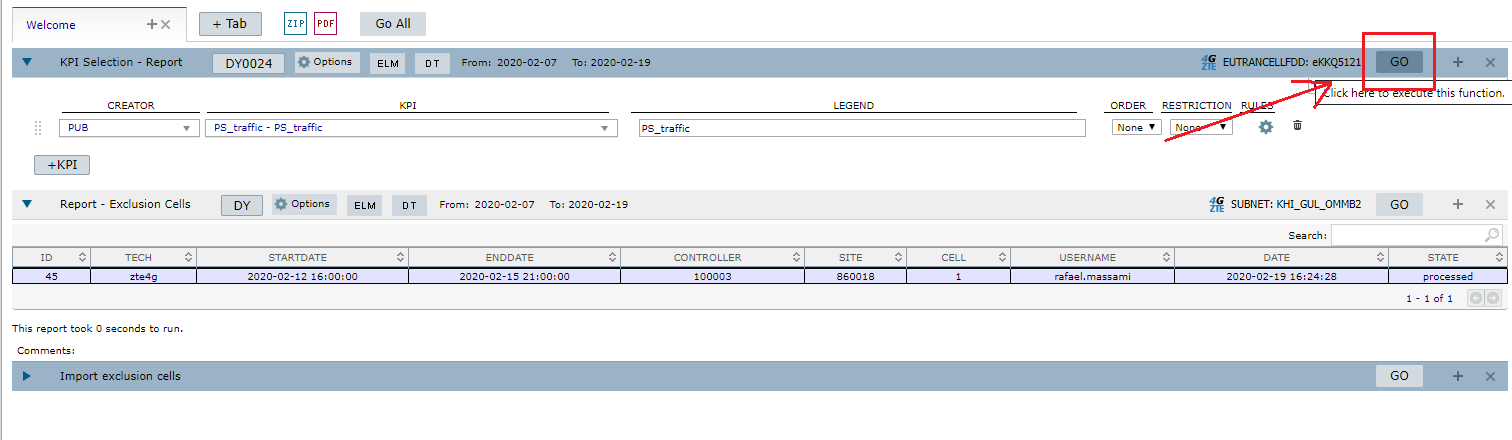
12 – Click on the Go button.
13 – And that’s it! Your report using the Exclusion Cells feature is done.
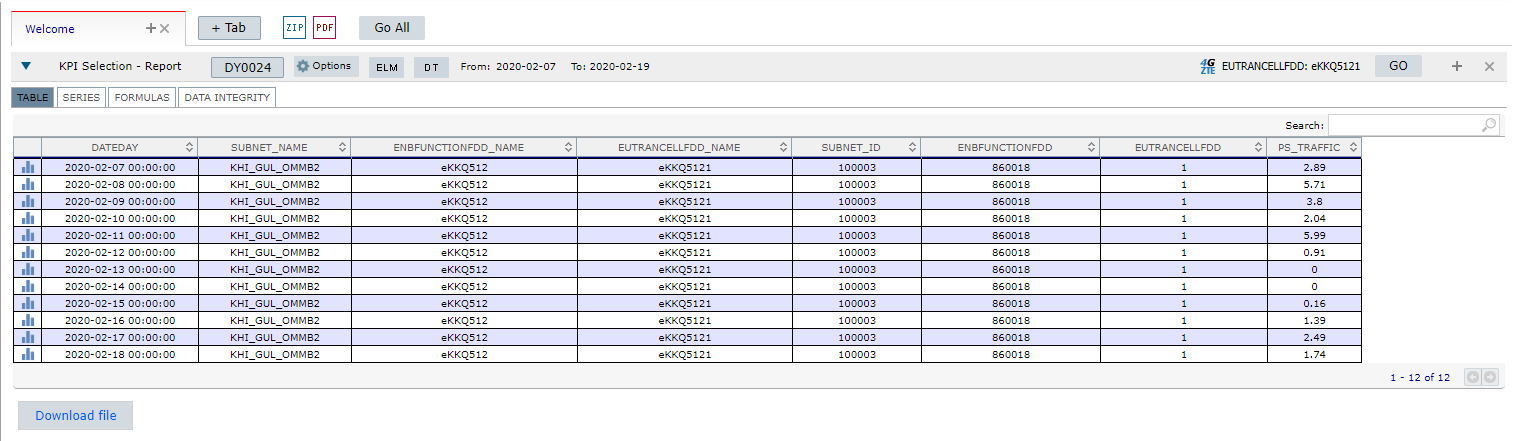
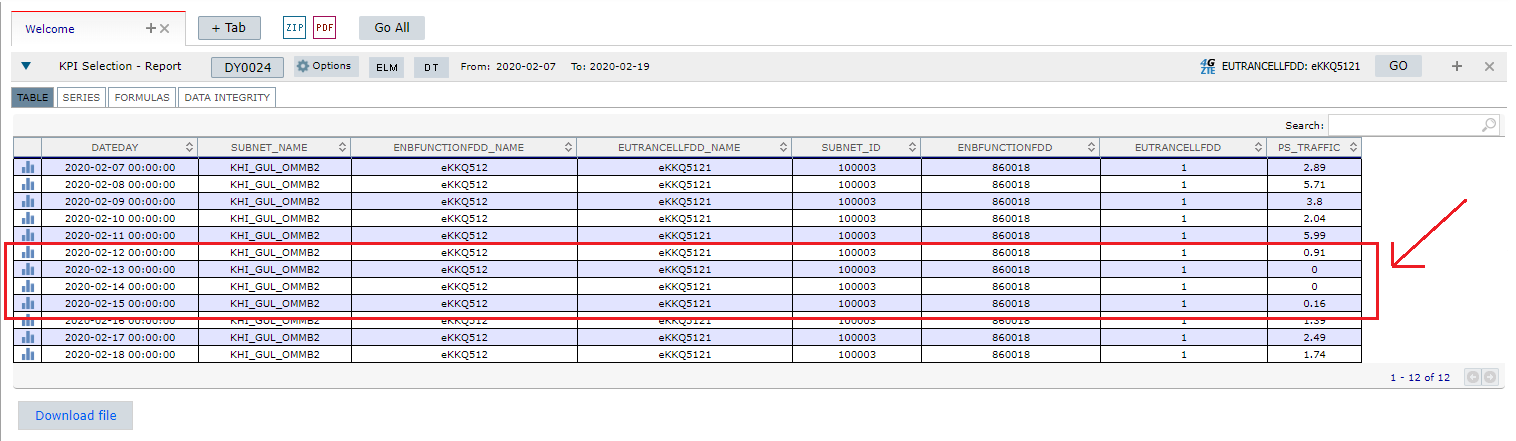
Note: You can see that the cell data on the days that were excluded from the report are either reduced or none.
COMMON ERRORS
- Not filling correctly the exclusion cells template. Example: forgetting to fill the site ID, putting the wrong ID for a controller, etc.
- When generating the report forgetting to select the DY0024 option. Without this filter, the report will not consider the Exclusion Cells feature.